> For the complete documentation index, see [llms.txt](https://docs.caf.io/llms.txt). Markdown versions of documentation pages are available by appending `.md` to page URLs; this page is available as [Markdown](https://docs.caf.io/caf-docs/user-guide/organizations/sso-configurations/okta.md).
# Okta (SAML / OIDC)
Configure SSO with Okta using SAML or OIDC protocols.
This guide explains how to configure SSO integration between Organizations and Okta. After configuring Okta, return to the [Organizations SSO Configuration Guide](/caf-docs/user-guide/organizations/sso-configurations.md) to complete the setup.
{% hint style="info" %}
**Before you begin:** Open **Authentication** → **SSO** in Organizations and copy the **Entity ID** and **ACS URL** (SAML) or **Redirect URI** (OIDC) as described in [Step 2 of the SSO Configuration Guide](/caf-docs/user-guide/organizations/sso-configurations.md#step-2-enable-sso-and-configure-the-provider).
{% endhint %}
***
## Prerequisites
* Administrator access to Okta
* Super Admin access to Organizations
***
## Choose the Protocol
{% tabs %}
{% tab title="SAML" %}
## SAML Configuration
### Create Application in Okta
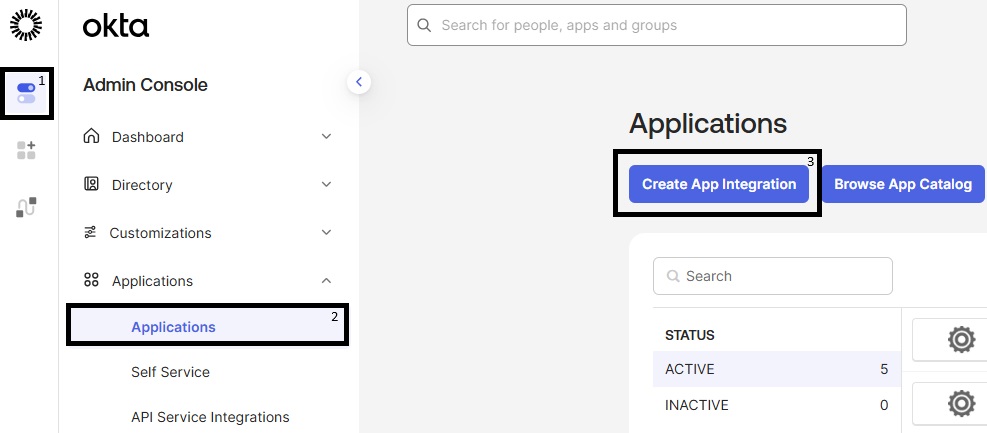
1. Access the [Okta Admin Console](https://admin.okta.com)
2. Navigate to **Applications** → **Applications**
3. Click **Create App Integration**
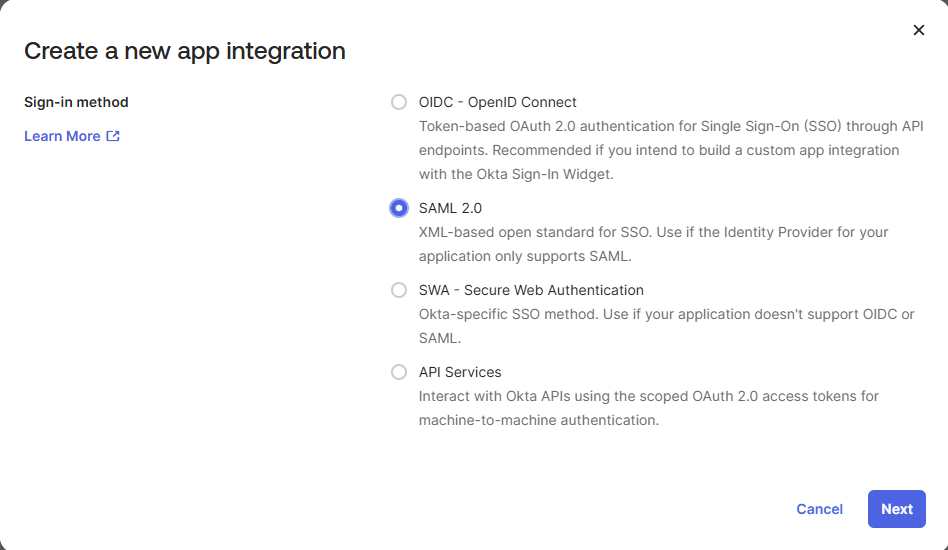
4. Select **SAML 2.0** and click **Next**
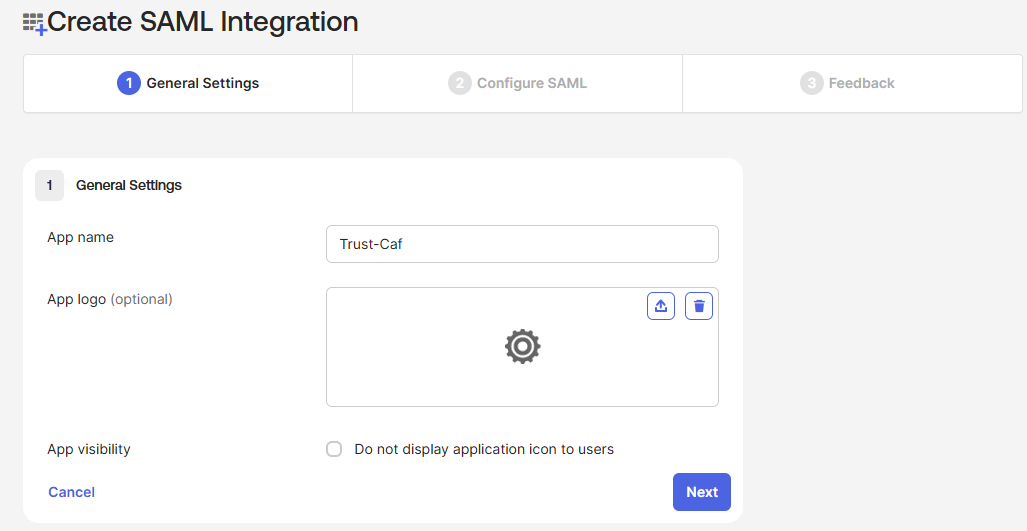
5. Configure the **App name** (e.g., "Certta") and click **Next**
### Configure SAML Settings
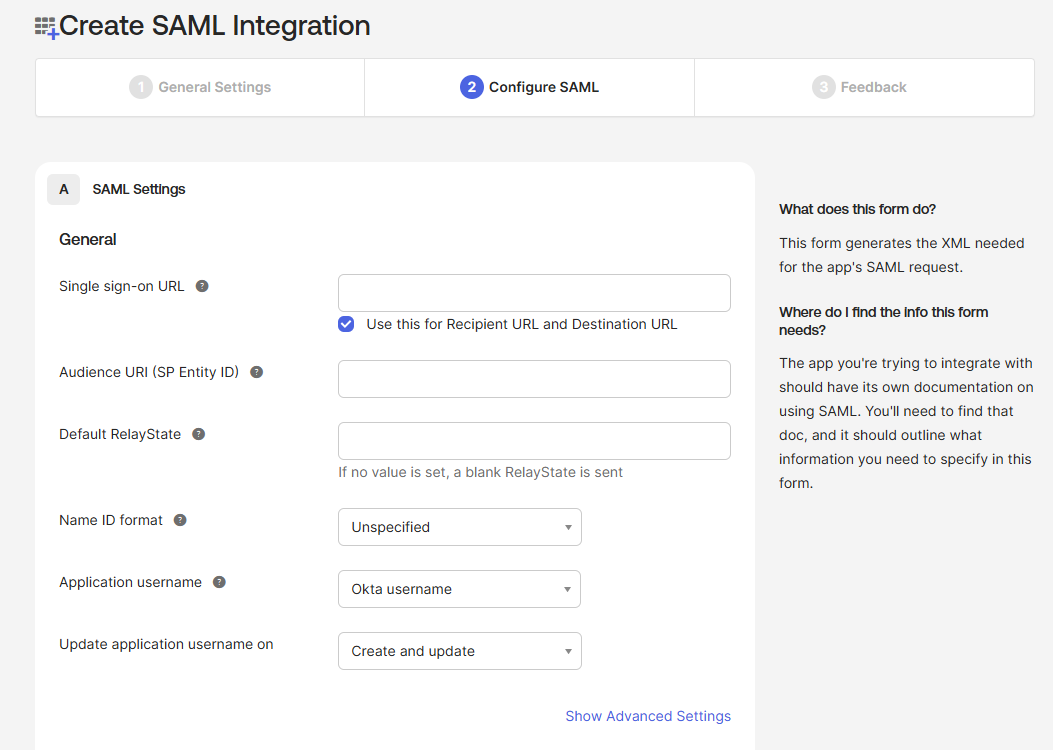
In the **SAML Settings** section, configure:
| Okta Field | Value |
| ------------------------------- | ------------------------------------------------- |
| **Single sign-on URL** | Paste the **ACS URL** copied from Organizations |
| **Audience URI (SP Entity ID)** | Paste the **Entity ID** copied from Organizations |
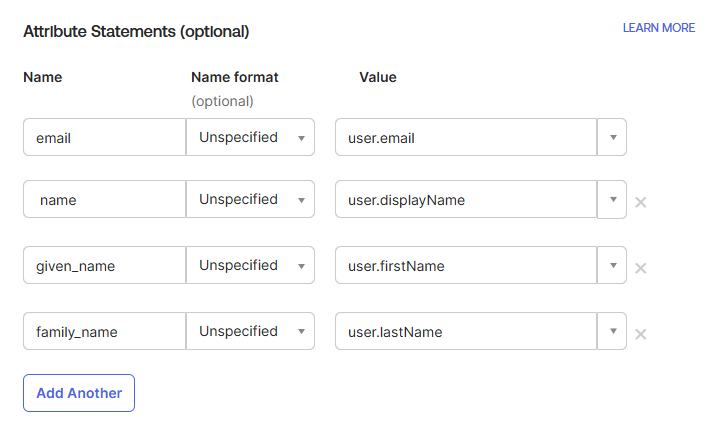
### Configure Attribute Statements
Configure the attributes that will be sent to Organizations:
| Name | Value |
| ------------- | ------------------ |
| `email` | `user.email` |
| `name` | `user.displayName` |
| `given_name` | `user.firstName` |
| `family_name` | `user.lastName` |
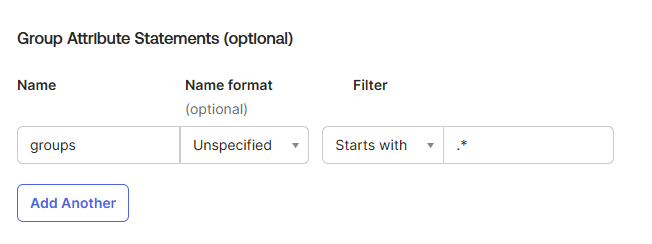
### Configure Group Attribute Statements (Optional)
If you use **Group assignment rules** based on IdP groups:
| Name | Filter |
| -------- | ----------------------------------------------- |
| `groups` | Matches regex: `.*` (or filter specific groups) |
Click **Next** and then **Finish**.
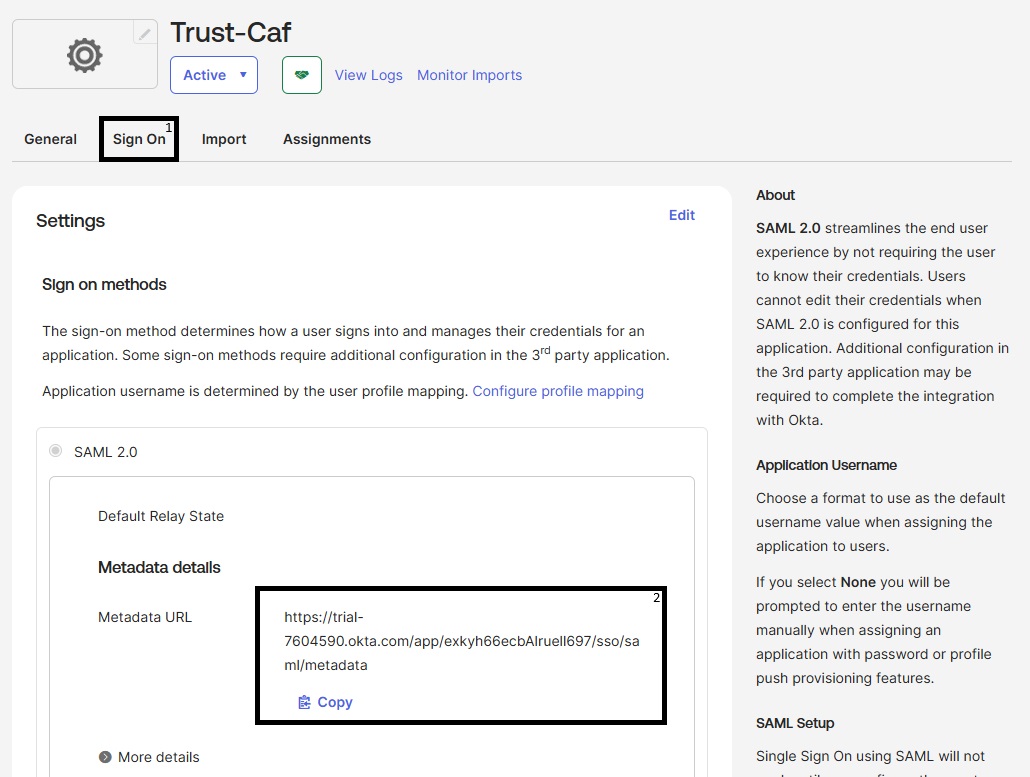
### Get Metadata URL
1. In the created application, access the **Sign On** tab
2. Copy the **Metadata URL**
The URL will have the format:
```url
https://{your-domain}.okta.com/app/{app-id}/sso/saml/metadata
```
{% endtab %}
{% tab title="OIDC" %}
## OIDC Configuration
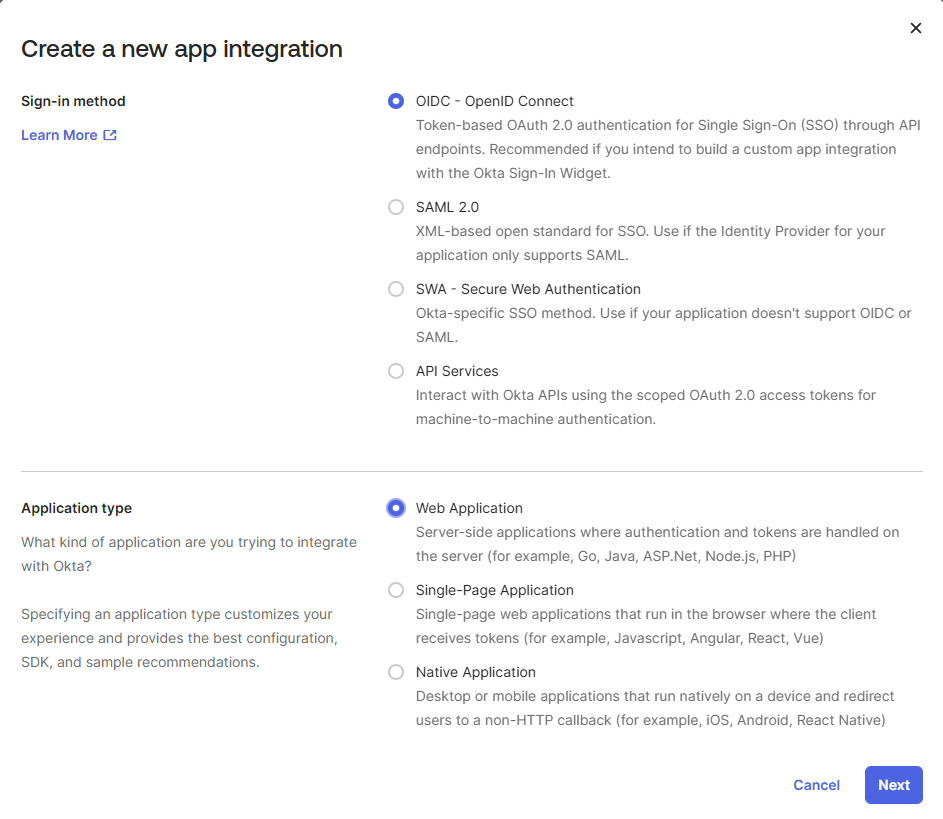
### Create Application in Okta
1. Access the [Okta Admin Console](https://admin.okta.com)
2. Navigate to **Applications** → **Applications**
3. Click **Create App Integration**
4. Select **OIDC - OpenID Connect**
5. Select **Web Application** and click **Next**
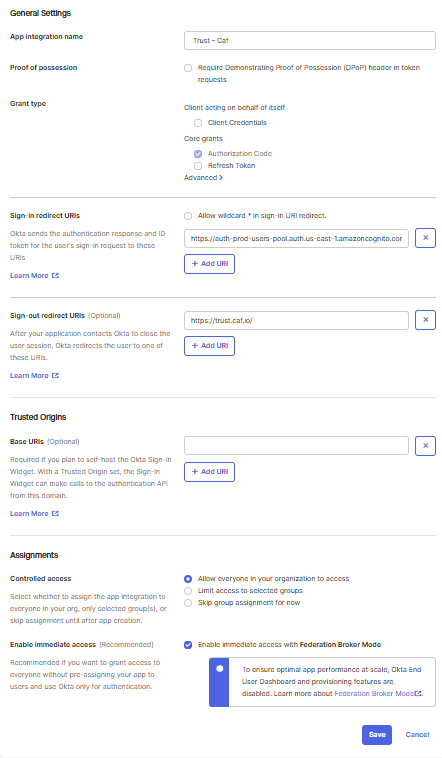
### Configure OIDC Settings
| Okta Field | Value |
| -------------------------- | ---------------------------------------------------------------------------- |
| **App integration name** | (e.g., "Certta") |
| **Grant type** | ✅ Authorization Code |
| **Sign-in redirect URIs** | Paste the **Redirect URI** copied from Organizations |
| **Sign-out redirect URIs** | Paste your organization URL (for example, `https://{your-alias}.sso.caf.io`) |
| **Controlled access** | Select who can access the application |
Click **Save**.
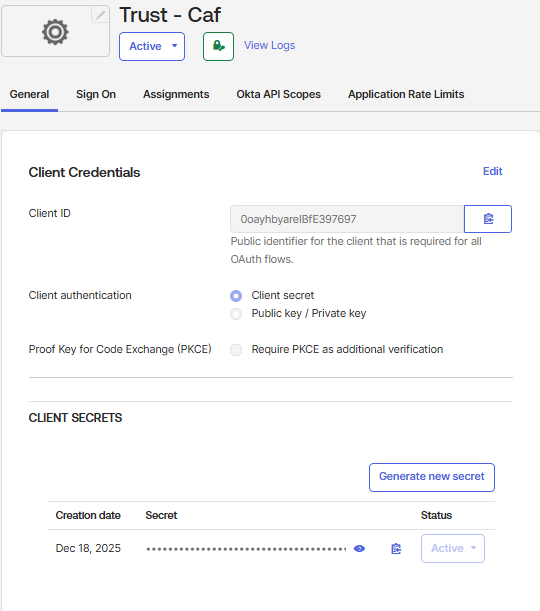
### Get Credentials
In the created application, copy the following information:
| Okta Field | Use in Organizations as |
| ----------------- | ----------------------- |
| **Client ID** | Client ID |
| **Client Secret** | Client Secret |
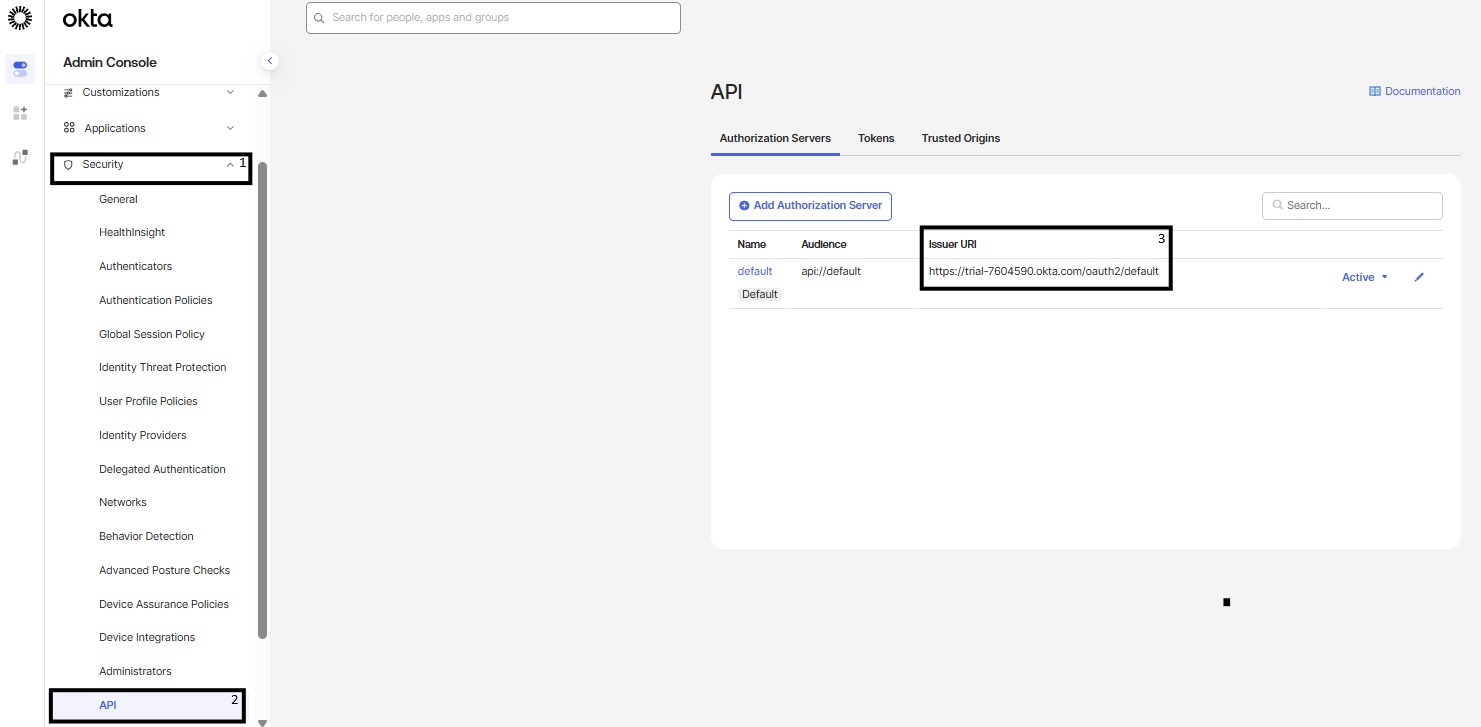
### Get Issuer URL
The Okta Issuer URL follows the format:
```
https://{your-domain}.okta.com
```
Or, if you use a custom Authorization Server:
```
https://{your-domain}.okta.com/oauth2/{authorization-server-id}
```
{% hint style="info" %}
1. Navigate to **Security** → **API** → **Authorization Servers**
2. Copy the **Issuer URL** from the Authorization Server you use for this application
{% endhint %}
{% hint style="warning" %}
Configure the step below when you use **Group assignment rules** based on IdP groups. Otherwise, skip to [Assign Users or Groups](#assign-users-or-groups).
{% endhint %}
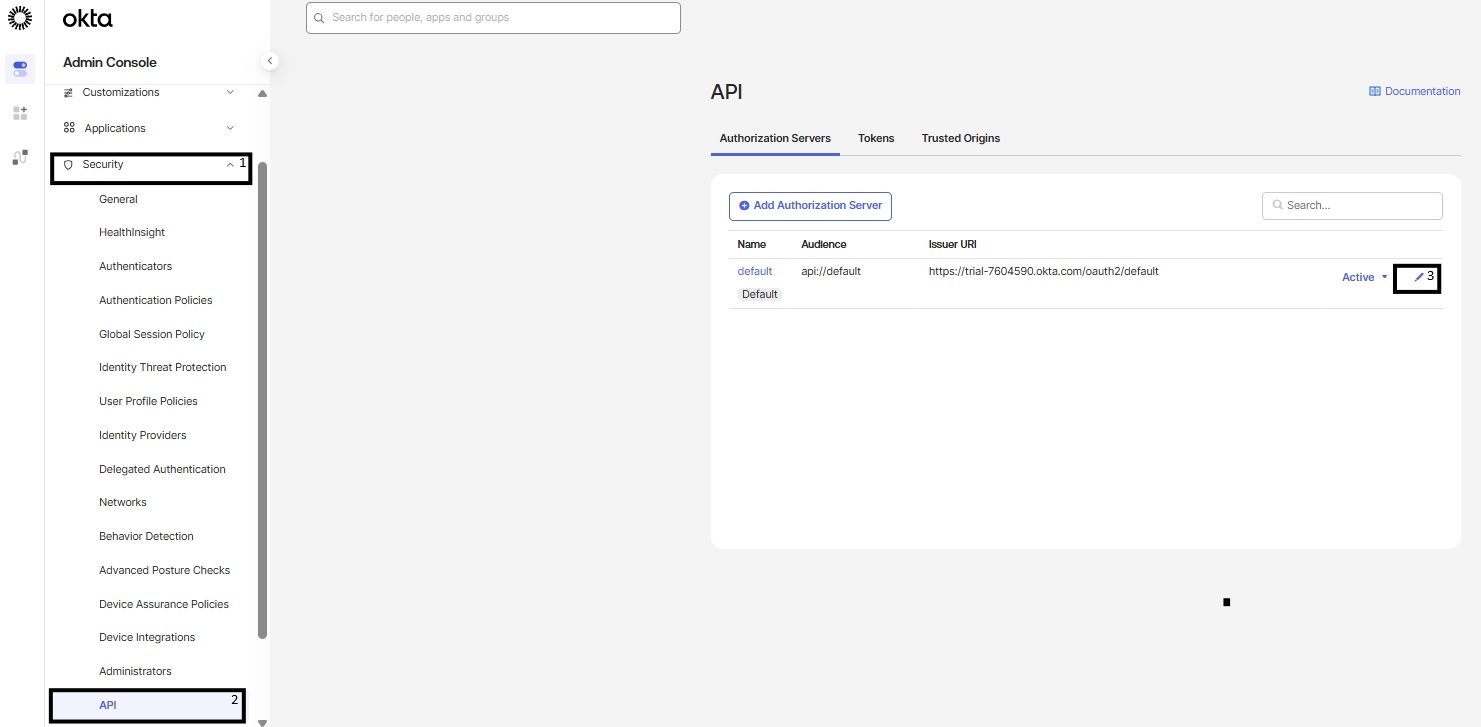
### Configure Group Scopes (Optional)
To include groups in OIDC tokens for **Group assignment rules**:
1. Access **Security** → **API** → **Authorization Servers**
2. Select the Authorization Server being used (for example, `default`)
3. Open the **Claims** tab and add a **groups** claim mapped to user groups
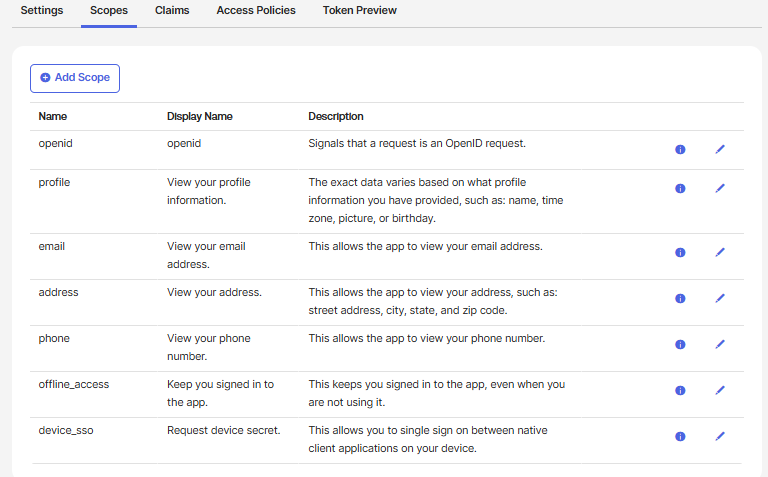
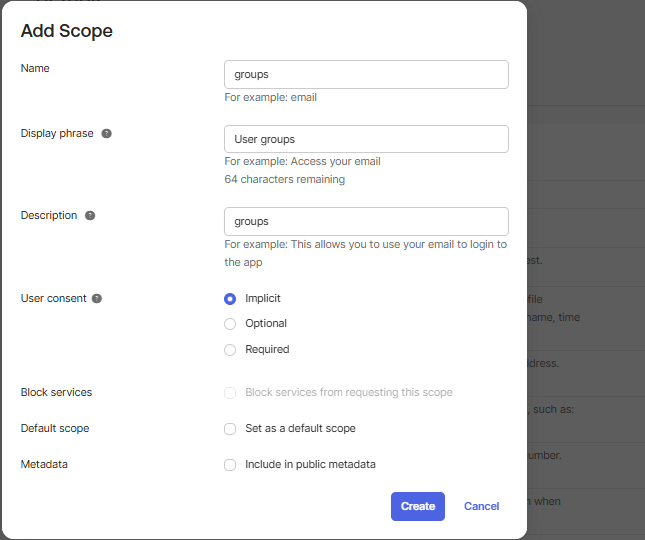
4. Open the **Scopes** tab and add a `groups` scope if your server requires explicit scopes
5. Click **Add Scope** if you need a dedicated groups scope
6. In Organizations, add `groups` to **Authorization scopes** on the **SSO** tab (for example, `openid email profile groups`) and map **Groups** on the **Attribute mapping** tab to `groups`
{% endtab %}
{% endtabs %}
***
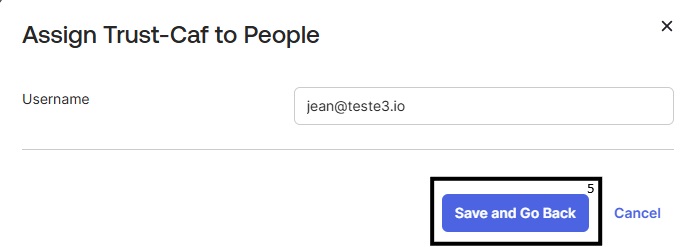
## Assign Users or Groups
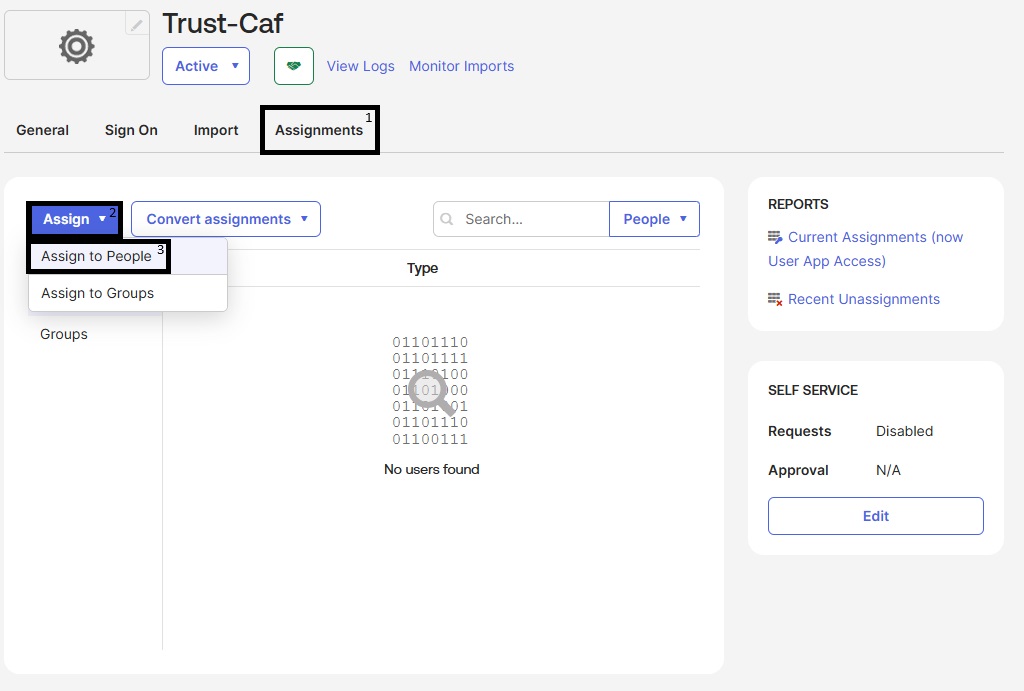
1. In the created application, access the **Assignments** tab
2. Click **Assign**
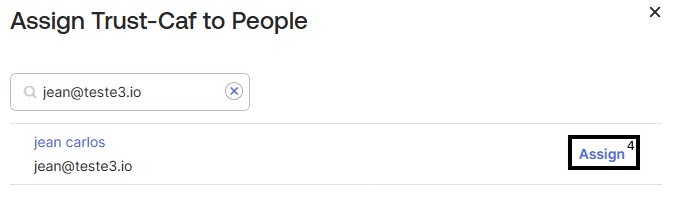
3. Select **Assign to People** or **Assign to Groups**
4. Select the users or groups that will have access and click **Assign**
5. Click **Save and Go Back**
***
## Next Steps
After configuring the identity provider, return to the [Organizations SSO Configuration Guide](/caf-docs/user-guide/organizations/sso-configurations.md) to:
1. [Configure attribute mapping](/caf-docs/user-guide/organizations/sso-configurations.md#step-3-configure-attribute-mapping)
2. [Configure group assignment rules](/caf-docs/user-guide/organizations/sso-configurations.md#step-4-configure-group-assignment-rules)
3. [Save and test](/caf-docs/user-guide/organizations/sso-configurations.md#step-5-save-and-test)
***
## Troubleshooting
| Problem | Probable Cause | Solution |
| ------------------- | --------------------------- | ------------------------------------------------------------------- |
| Redirect URI error | URI does not match | Verify that the reply URL is identical in both systems |
| Invalid token | Incorrect Client Secret | Regenerate the Client Secret in Okta and update it in Organizations |
| Groups not received | Groups claim not configured | Configure the groups claim in the Authorization Server |
| User not found | User not assigned | Add the user in the application's **Assignments** |
***
## References
* [Okta Documentation - SAML](https://developer.okta.com/docs/concepts/saml/)
* [Okta Documentation - OIDC](https://developer.okta.com/docs/concepts/oauth-openid/)
* [Configure group claims](https://developer.okta.com/docs/guides/customize-tokens-groups-claim/)
---
# Agent Instructions
This documentation is published with GitBook. GitBook is the documentation platform designed so that both humans and AI agents can read, navigate, and reason over technical content effectively. Learn more at gitbook.com.
## Querying This Documentation
If you need additional information that is not directly available in this page, you can query the documentation dynamically by asking a question.
Perform an HTTP GET request on the current page URL with the `ask` query parameter, and the optional `goal` query parameter:
```
GET https://docs.caf.io/caf-docs/user-guide/organizations/sso-configurations/okta.md?ask=&goal=
```
`ask` is the immediate question: it should be specific, self-contained, and written in natural language.
`goal` is optional and describes the broader end goal you are ultimately trying to accomplish on behalf of the user. GitBook uses it to tailor the answer towards what is most useful for that goal.
The response will contain a direct answer to the question and relevant excerpts and sources from the documentation.
Use this mechanism when the answer is not explicitly present in the current page, you need clarification or additional context, or you want to retrieve related documentation sections.