> For the complete documentation index, see [llms.txt](https://docs.caf.io/llms.txt). Markdown versions of documentation pages are available by appending `.md` to page URLs; this page is available as [Markdown](https://docs.caf.io/caf-docs/user-guide/organizations.md).
# Organizations
Manage members, access, and security for your organization in Organizations.
**Organizations** is the Certta admin console for identity and access management. Super Admins use it to configure the organization profile, manage people (members, administrators, roles, and groups), and set up security features such as SSO and SCIM provisioning.
Each organization is accessed at its own subdomain, for example `https://certta.sso.caf.io`. **Members** sign in at that URL with **Sign in with SSO** when SSO is enabled. **Super Admins** open the admin console at `https://certta.sso.caf.io/admin-login` using email and password.
***
## Access requirements
| Requirement | Description |
| -------------------------- | --------------------------------------------------------------------------------------------------------- |
| **Super Admin** | Full access to all areas described below. |
| **Member** | Can sign in and use linked Certta products according to group assignments. Cannot open the admin console. |
| **Organization subdomain** | The hostname alias identifies your tenant (for example, `certta` in `https://certta.sso.caf.io`). |
***
## Navigation overview
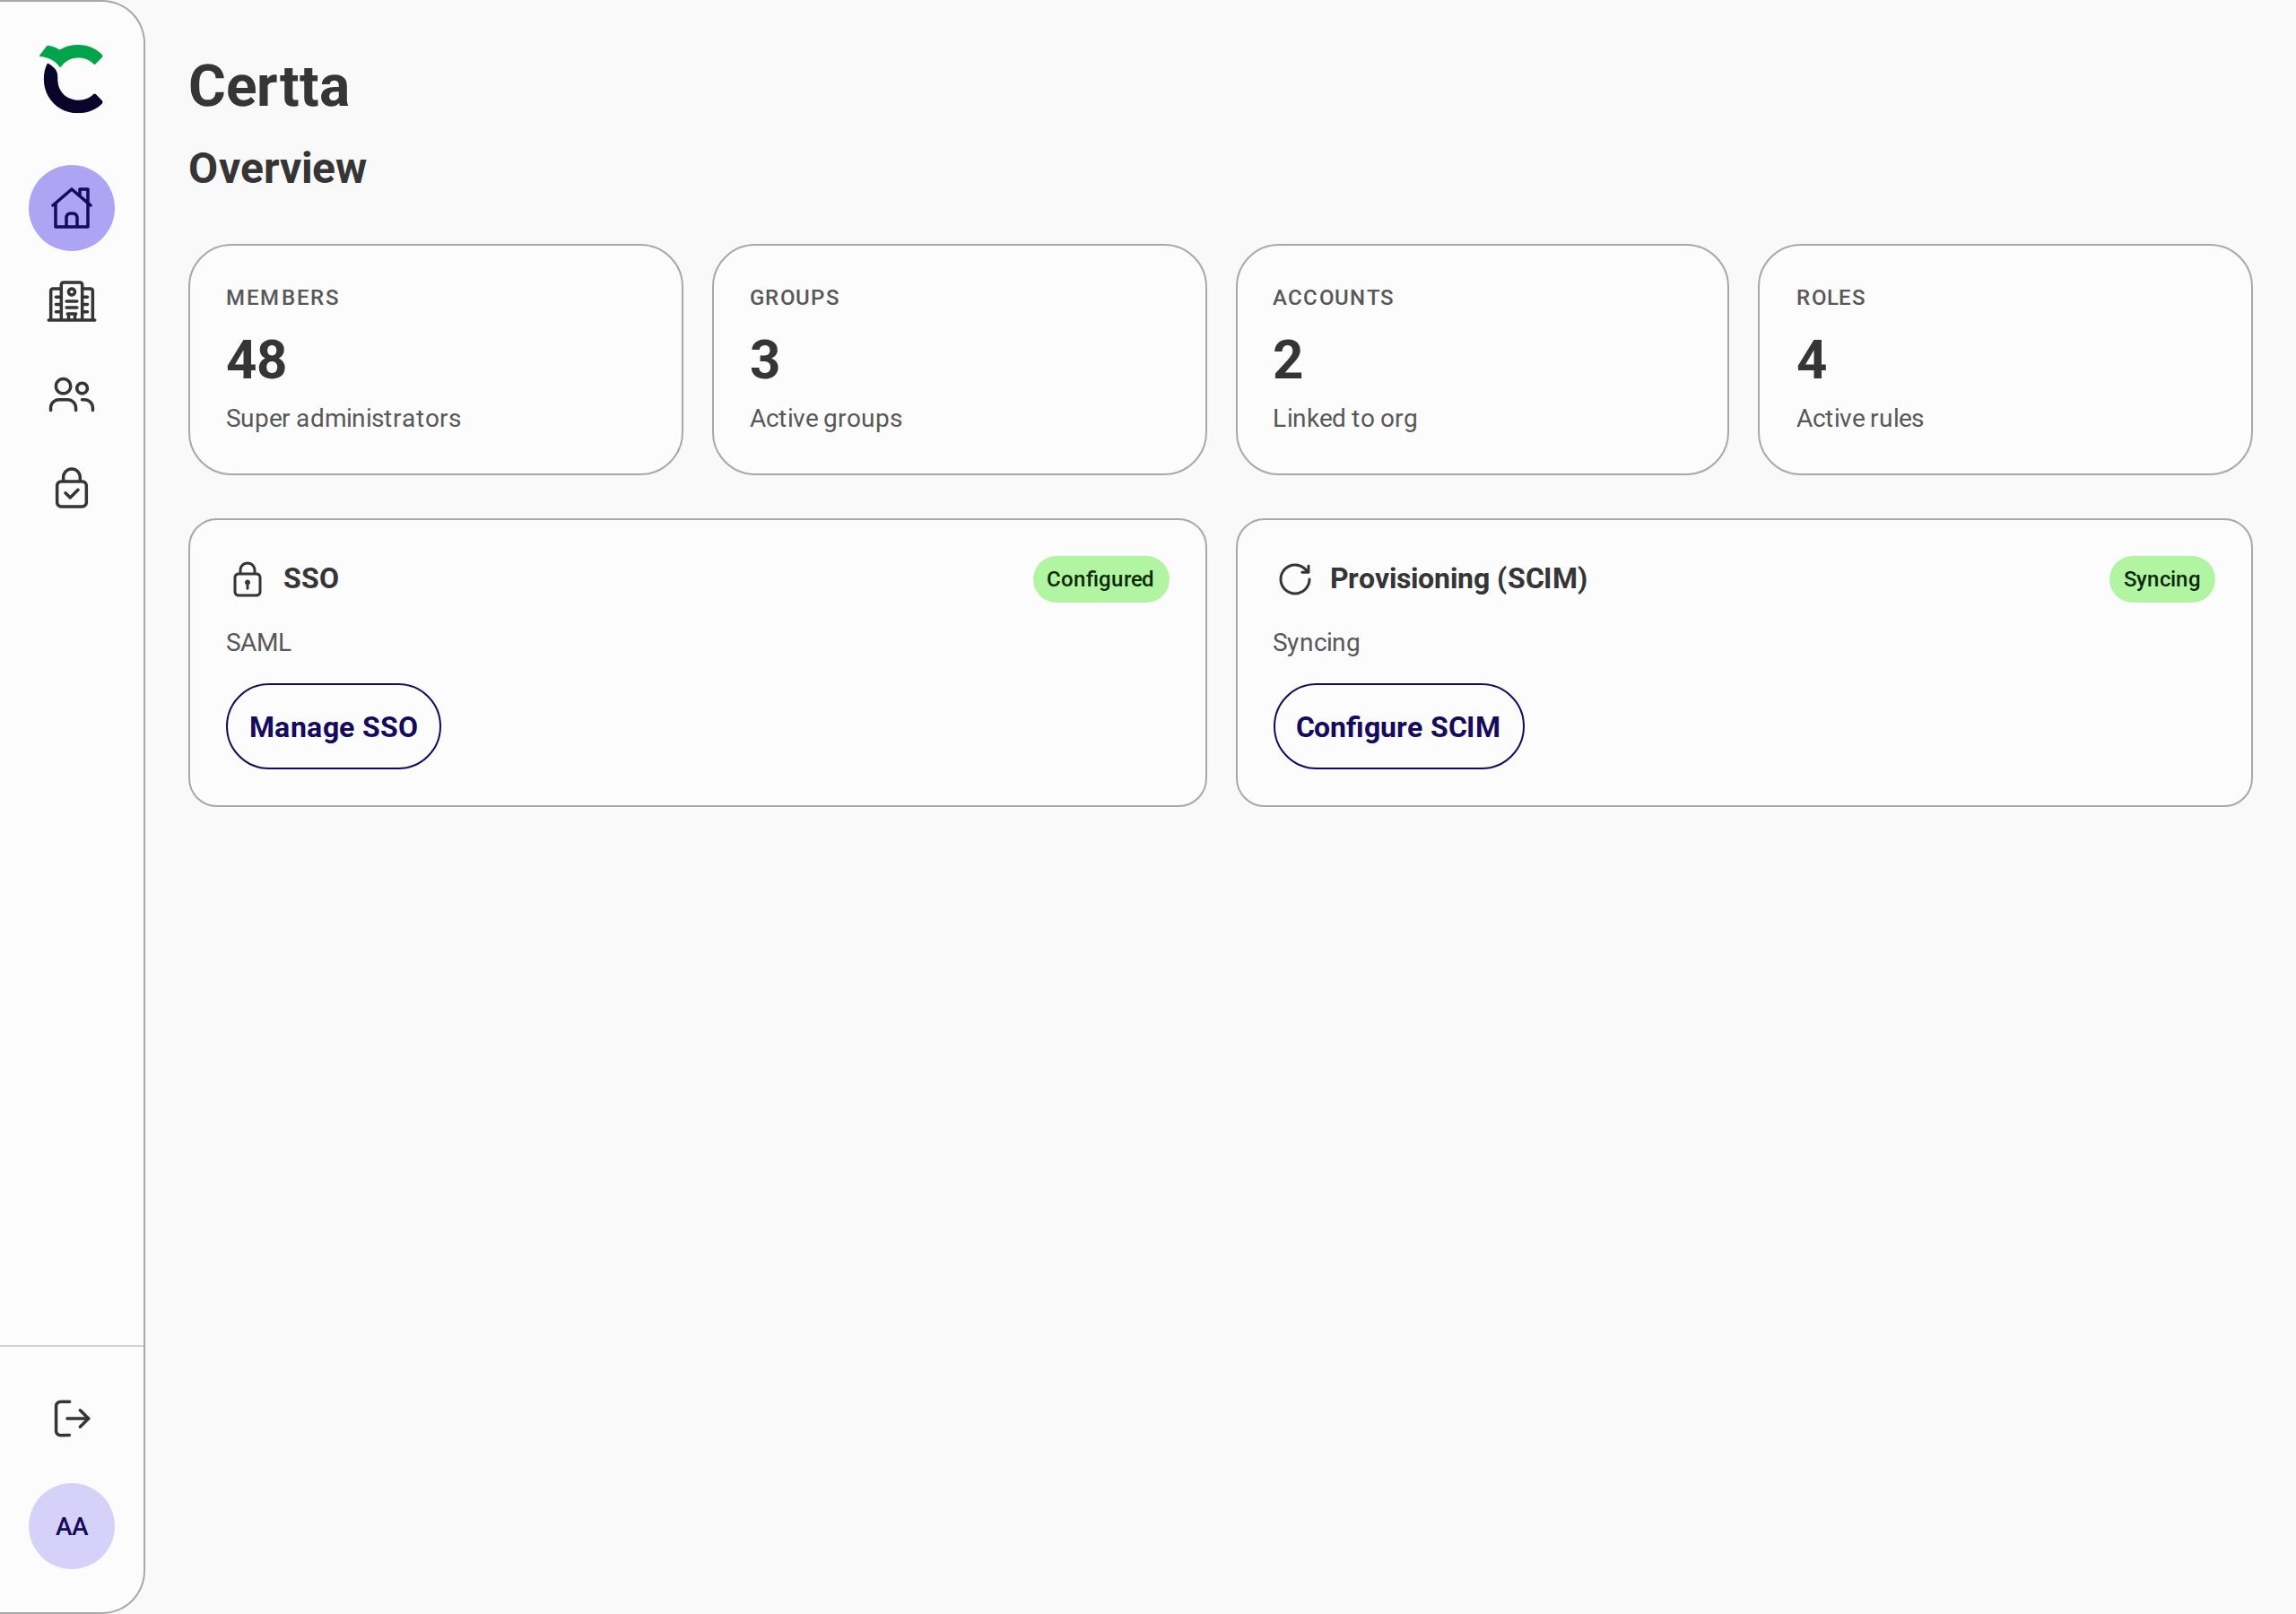
The admin sidebar includes four main areas:
| Area | Purpose |
| ---------------- | ---------------------------------------------------------------------------------------- |
| **Dashboard** | Overview of members, groups, linked accounts, and roles, plus shortcuts to SSO and SCIM. |
| **Organization** | Organization status, login URL, identifier, and linked Certta accounts. |
| **People** | Members, administrators, roles, and groups. |
| **Security** | SSO, attribute mapping, group assignment rules, and SCIM tokens. |
***
## Dashboard
The dashboard shows organization-wide counts and the status of SSO and SCIM provisioning.
| Stat | Description |
| ------------------- | -------------------------------------------------- |
| **Members** | Total members in the organization. |
| **Groups** | Groups used to bundle role and tenant assignments. |
| **Linked accounts** | Certta products linked to this organization. |
| **Roles** | Custom roles defined for fine-grained permissions. |
Use the SSO and SCIM cards to jump directly to the corresponding **Security** tabs.
***
## Organization
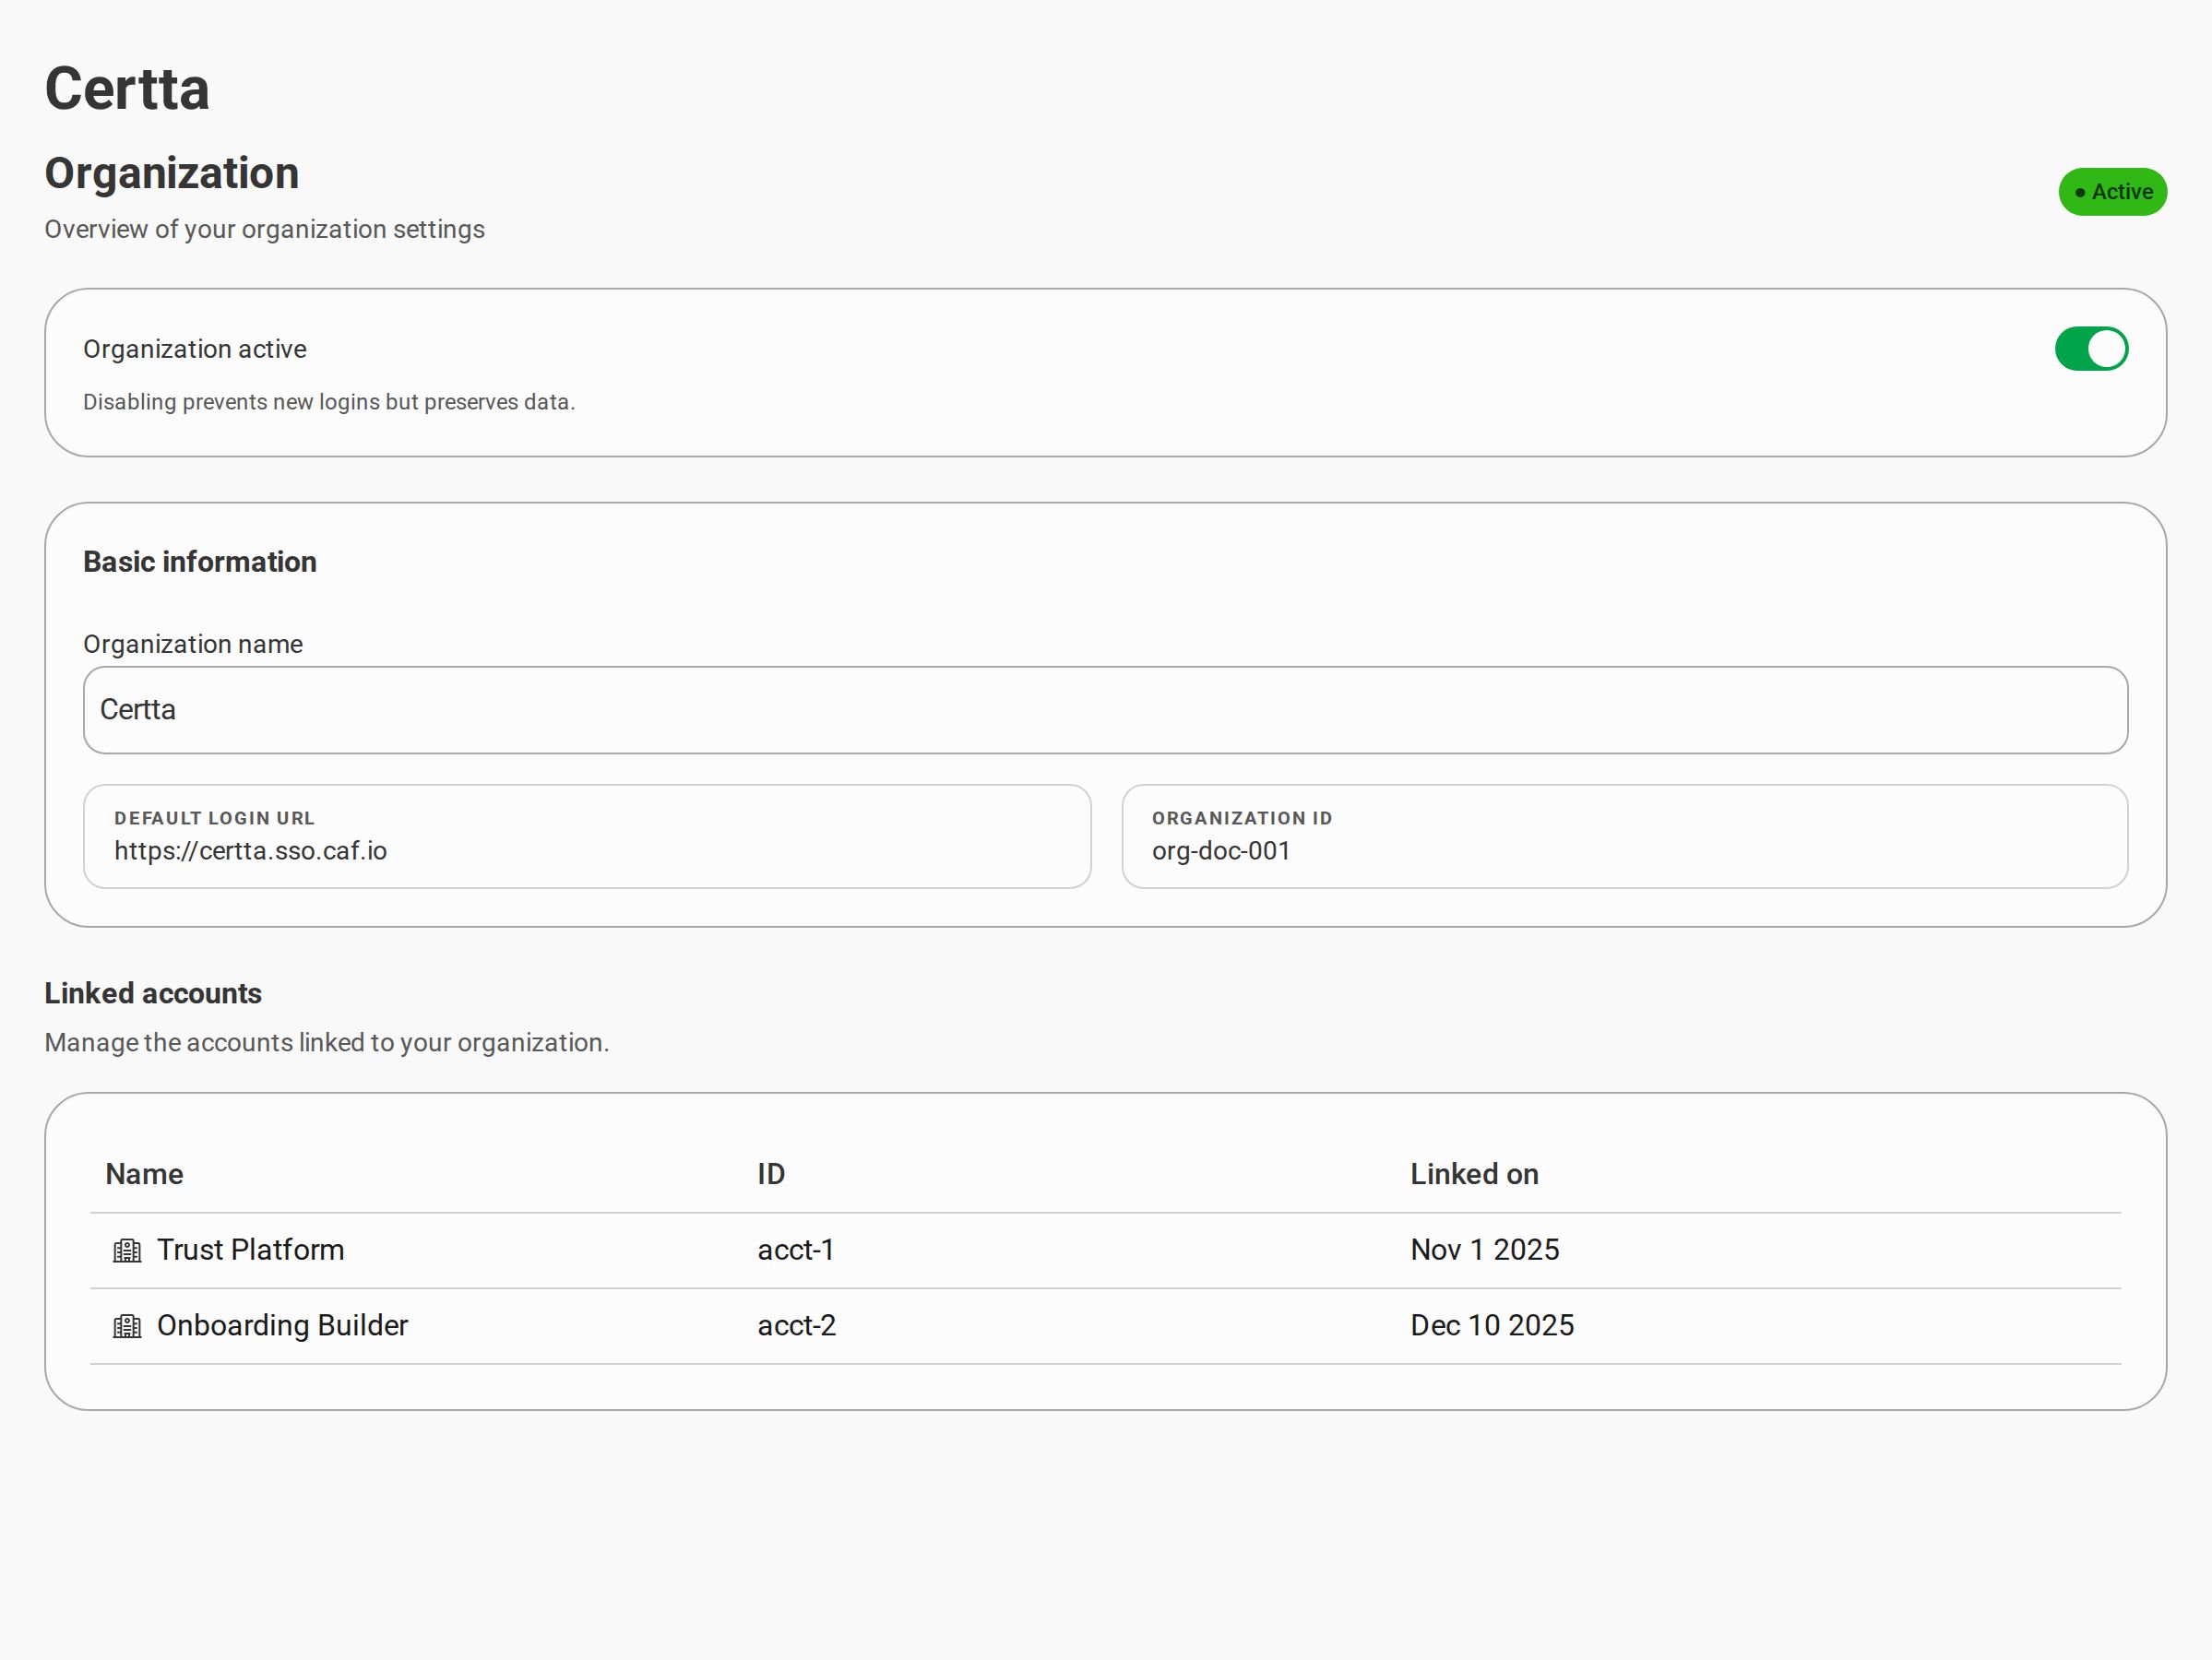
Configure organization-level settings: active status, display name, login URL, organization ID, and linked accounts.
| Field | Description |
| ----------------------- | ------------------------------------------------------------------ |
| **Organization active** | When disabled, new logins are blocked; existing data is preserved. |
| **Login URL** | URL members use to sign in (subdomain-based). |
| **Organization ID** | Internal identifier for APIs and support. |
| **Linked accounts** | Certta products connected to this organization. |
***
## People
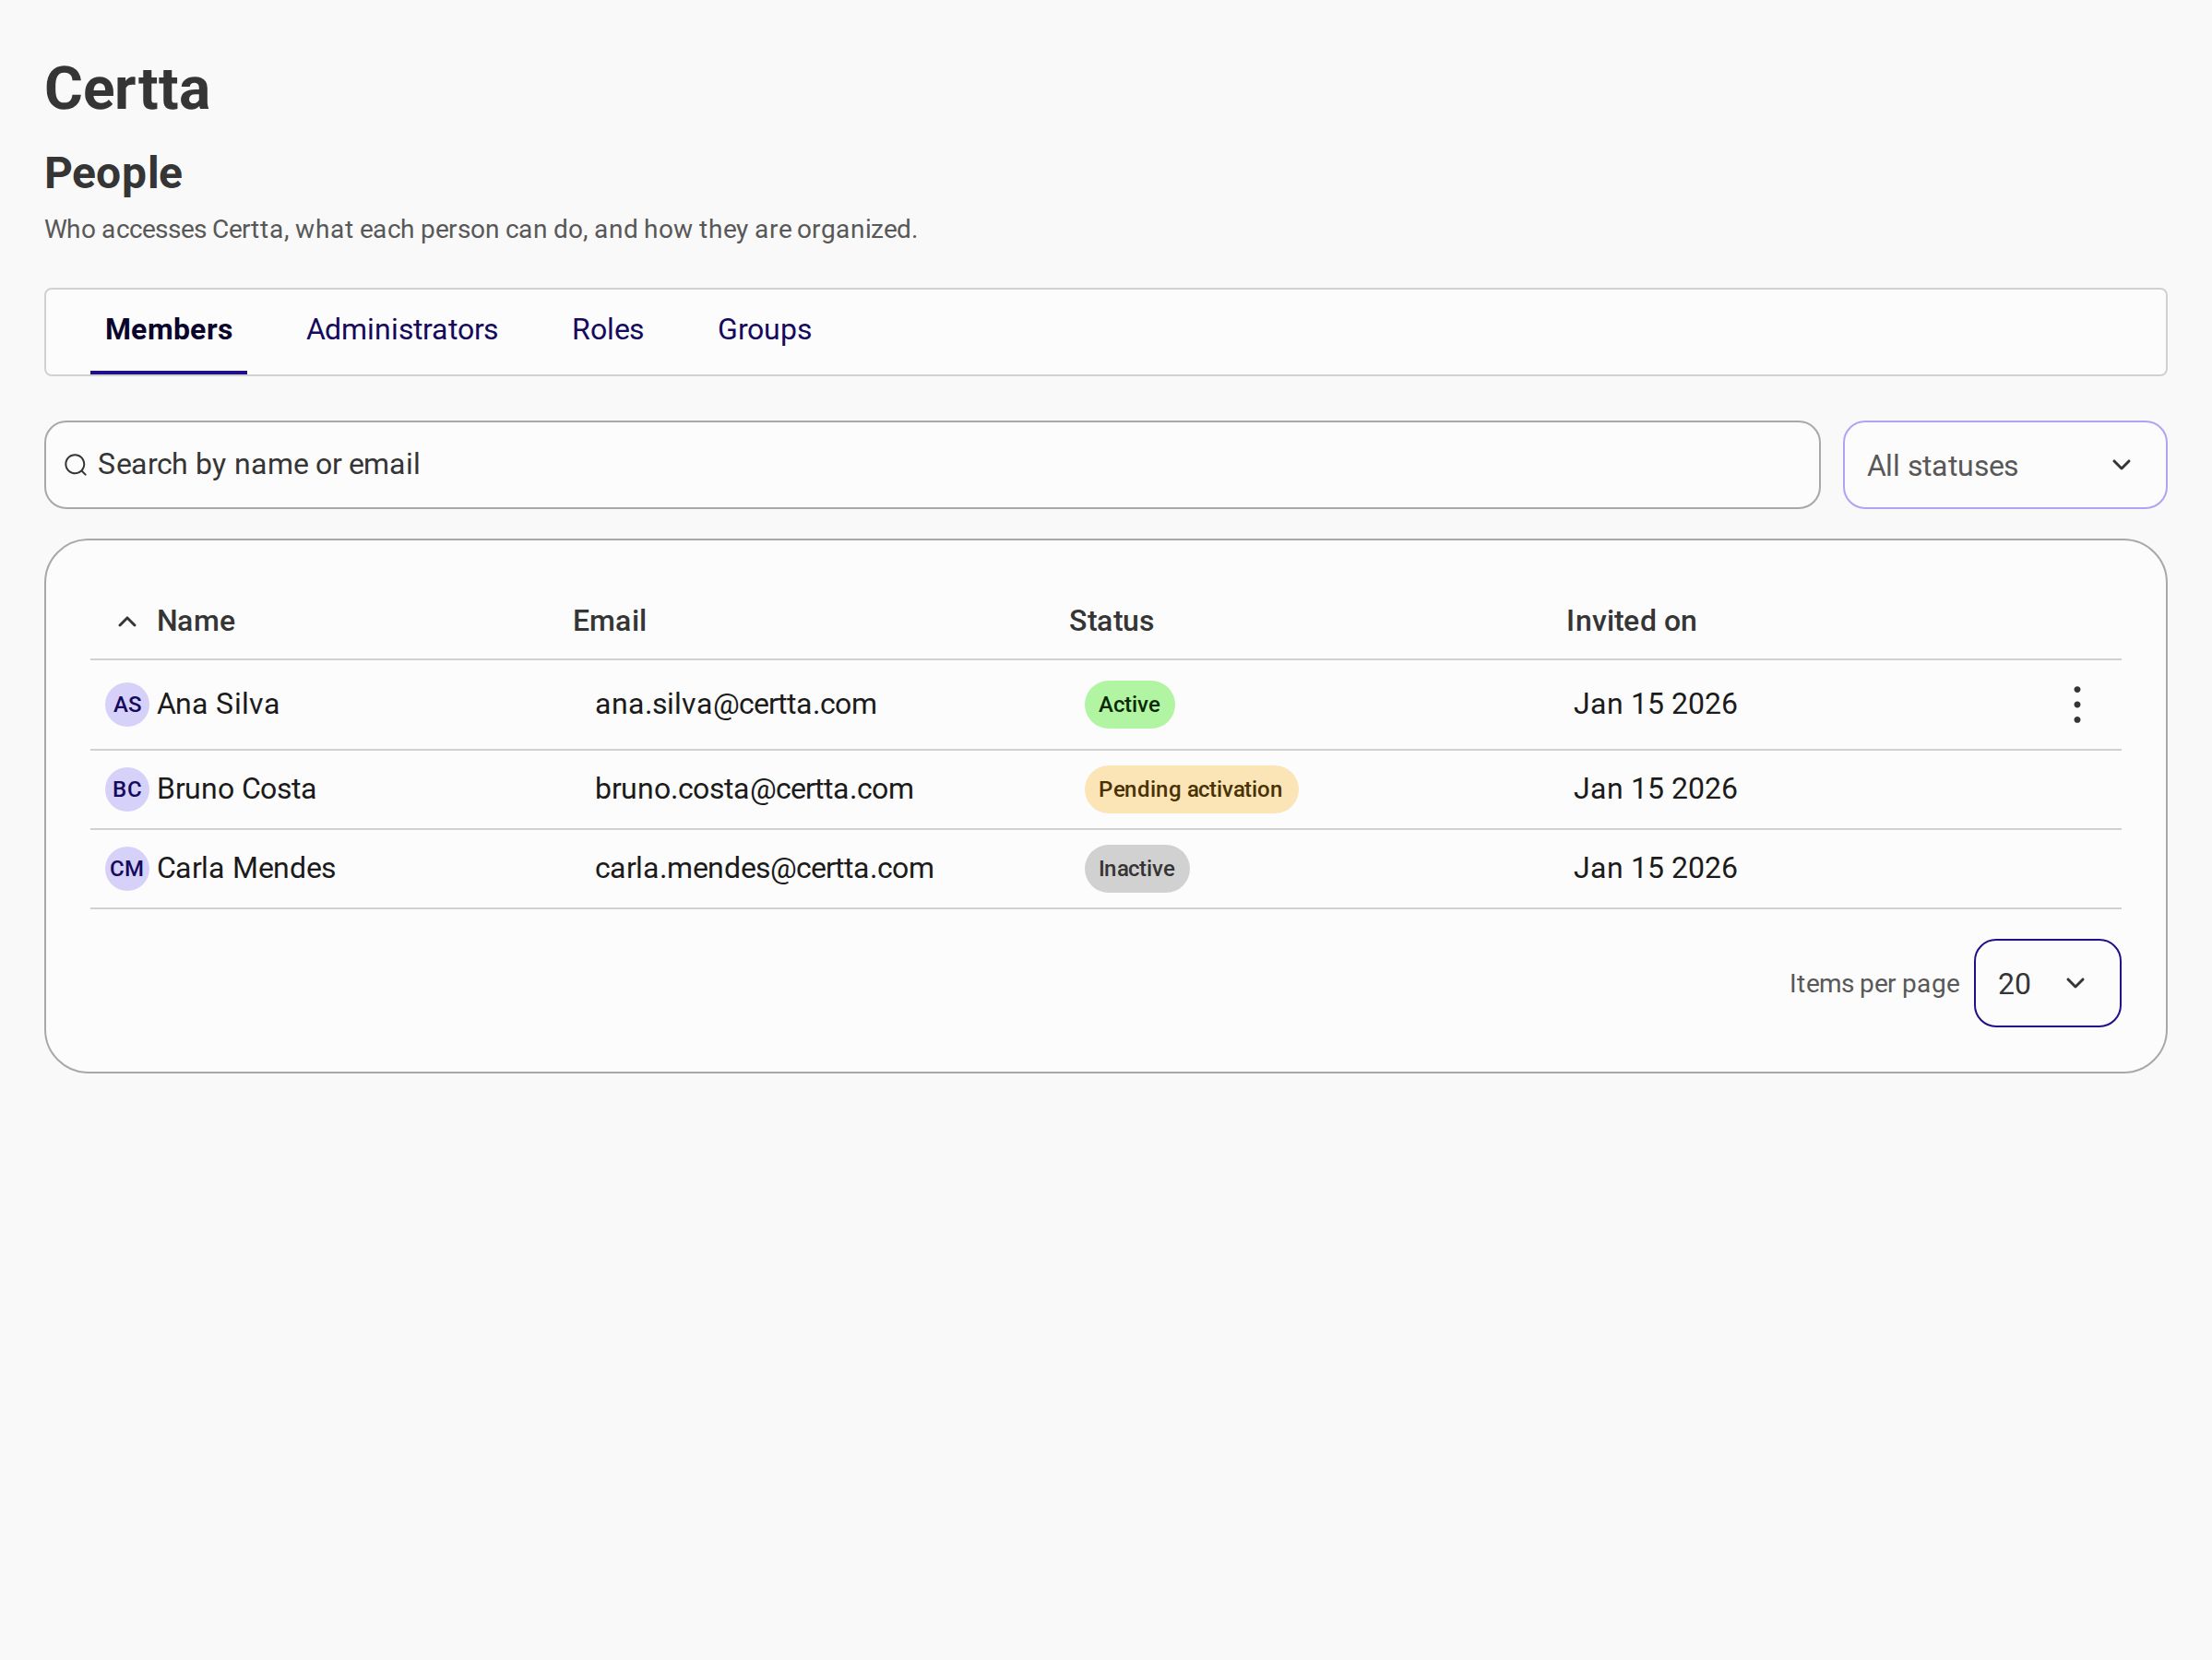
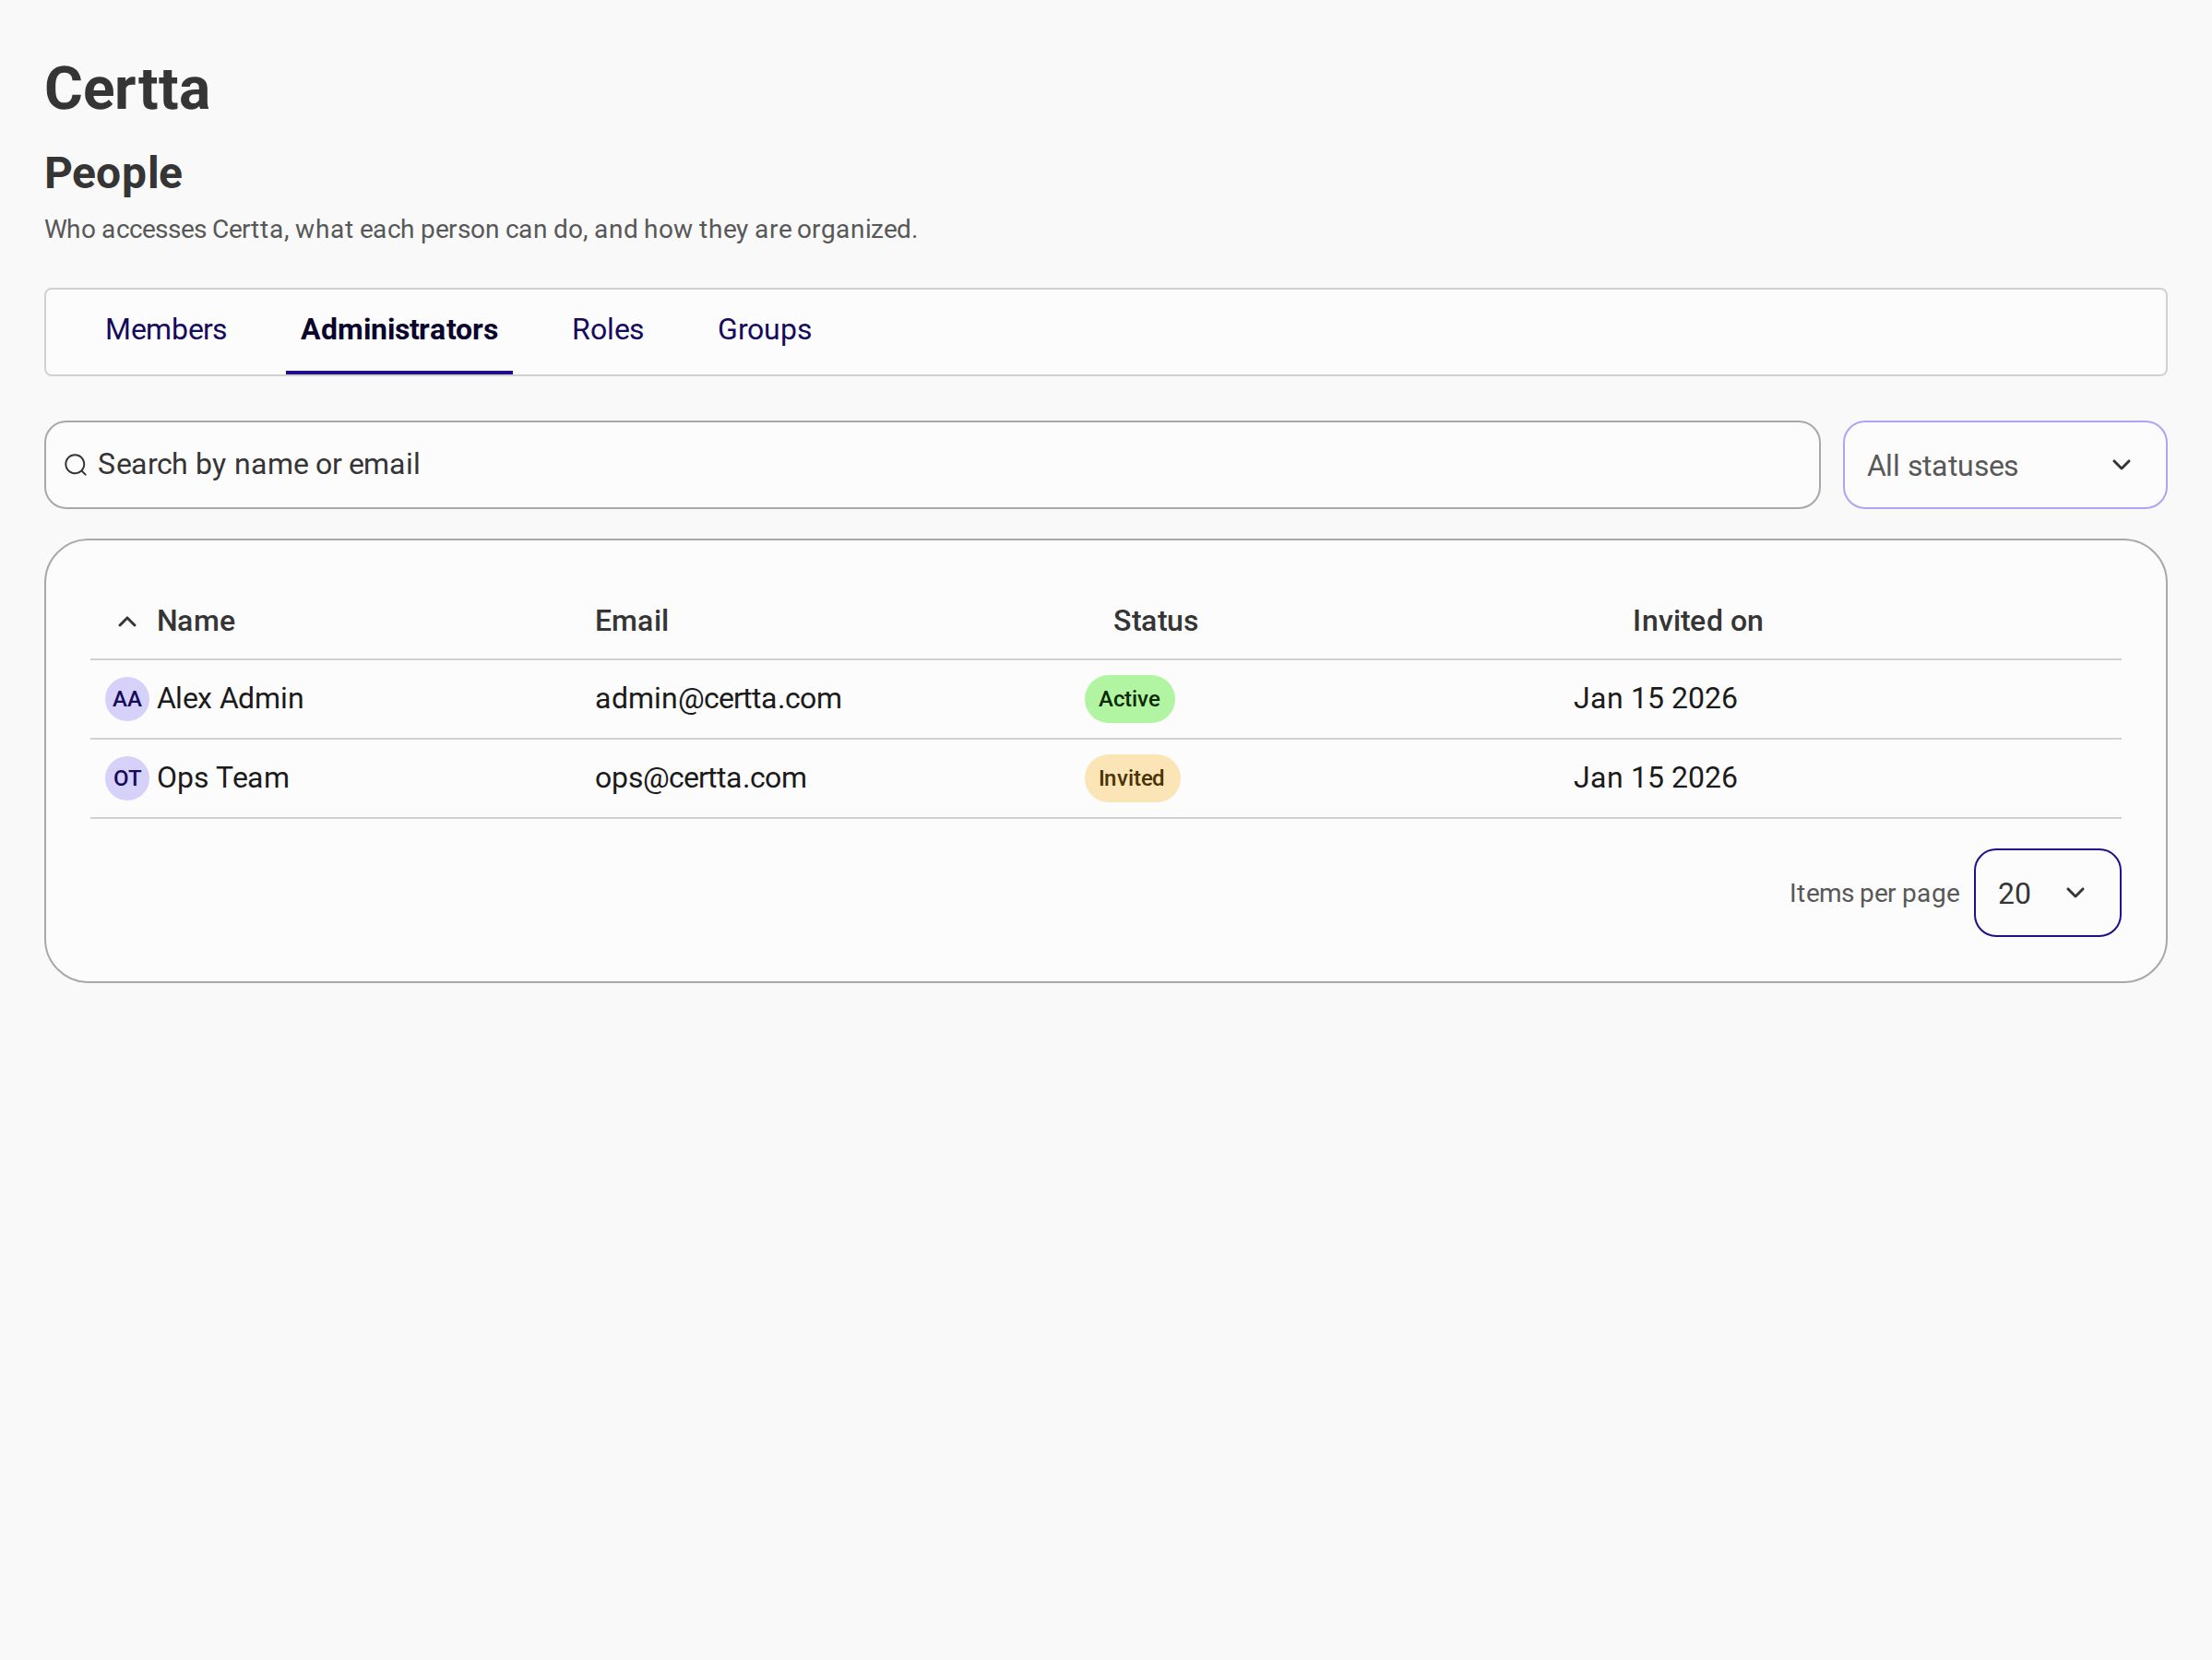
The **People** screen has four tabs: **Members**, **Administrators**, **Roles**, and **Groups**.
### Members
View and manage organization members. Search and filter by status, and deactivate accounts.
### Administrators
Super Admins who can manage the organization. View the list of administrators with access to the admin console.
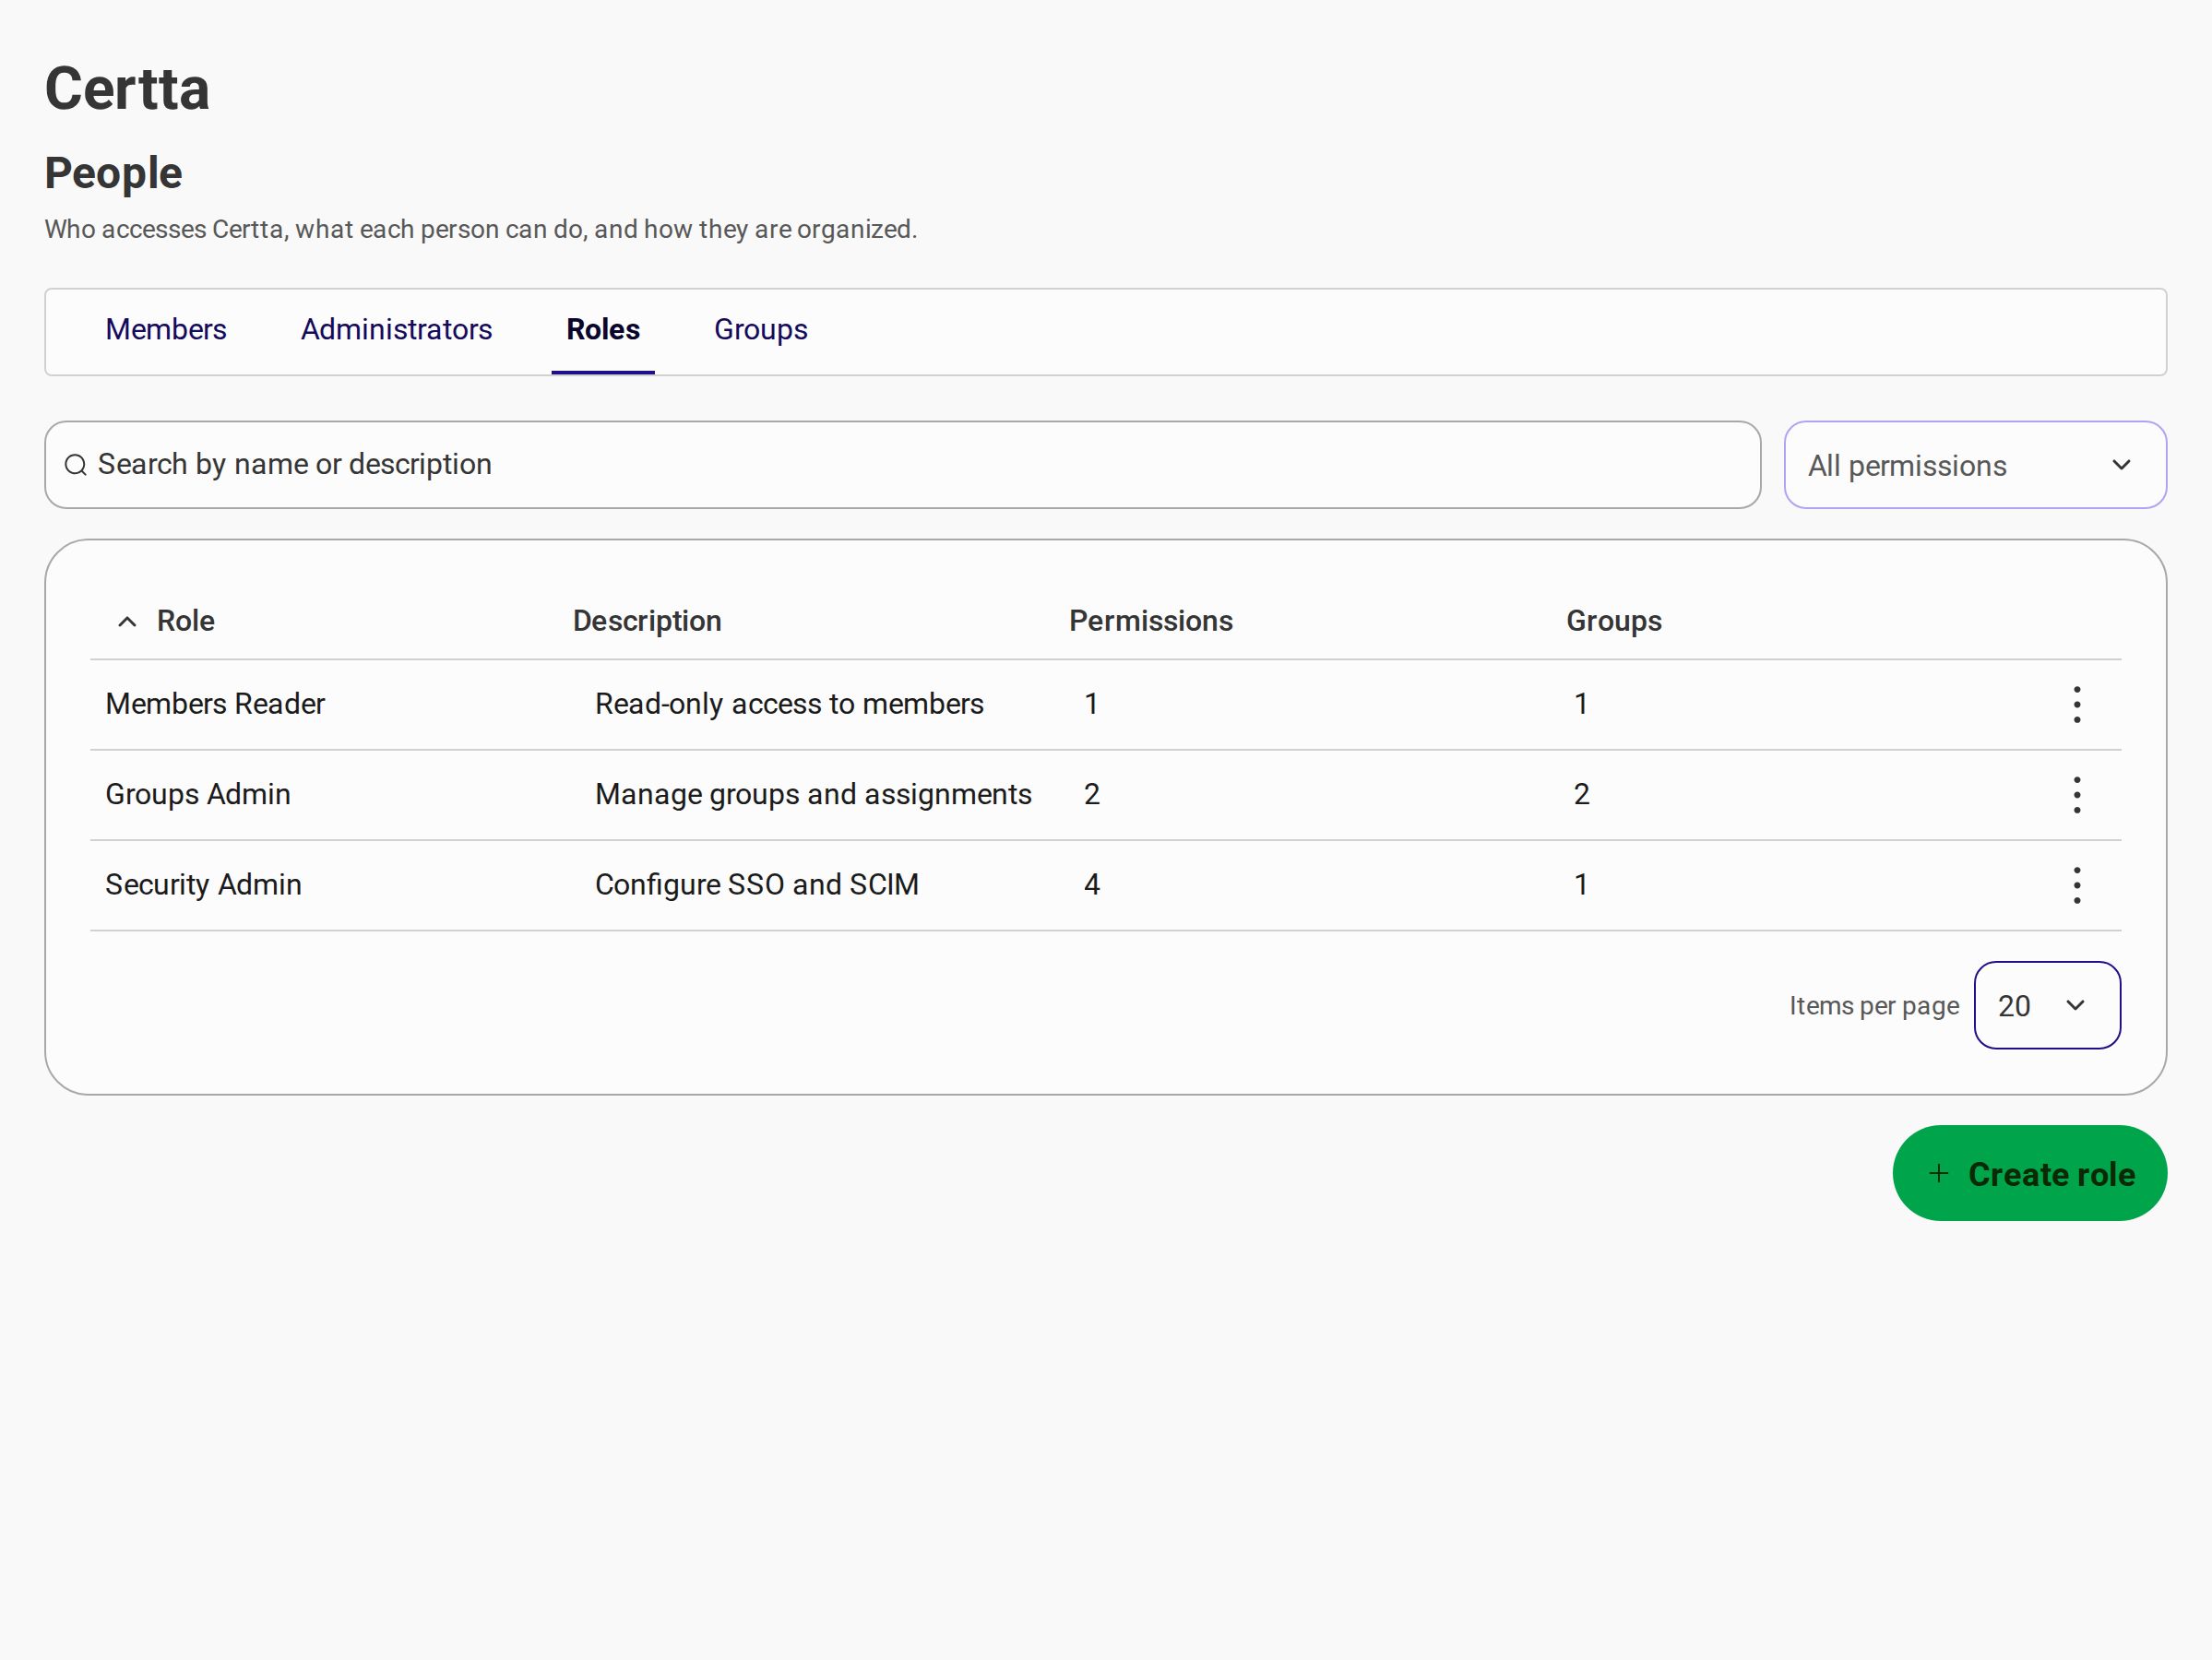
### Roles
Define named sets of **scopes** (permissions). Roles are attached to groups; members inherit access through group membership.
| Column | Description |
| --------------- | ---------------------------------------------------------------------- |
| **Role** | Display name of the custom role. |
| **Description** | Optional summary of the role purpose. |
| **Permissions** | Count of scopes assigned to the role. |
| **Groups** | Number of groups that reference this role in their access assignments. |
#### Create a role
1. Open **People** → **Roles**.
2. Select **Create role**.
3. Enter a **Name** and optional **Description**.
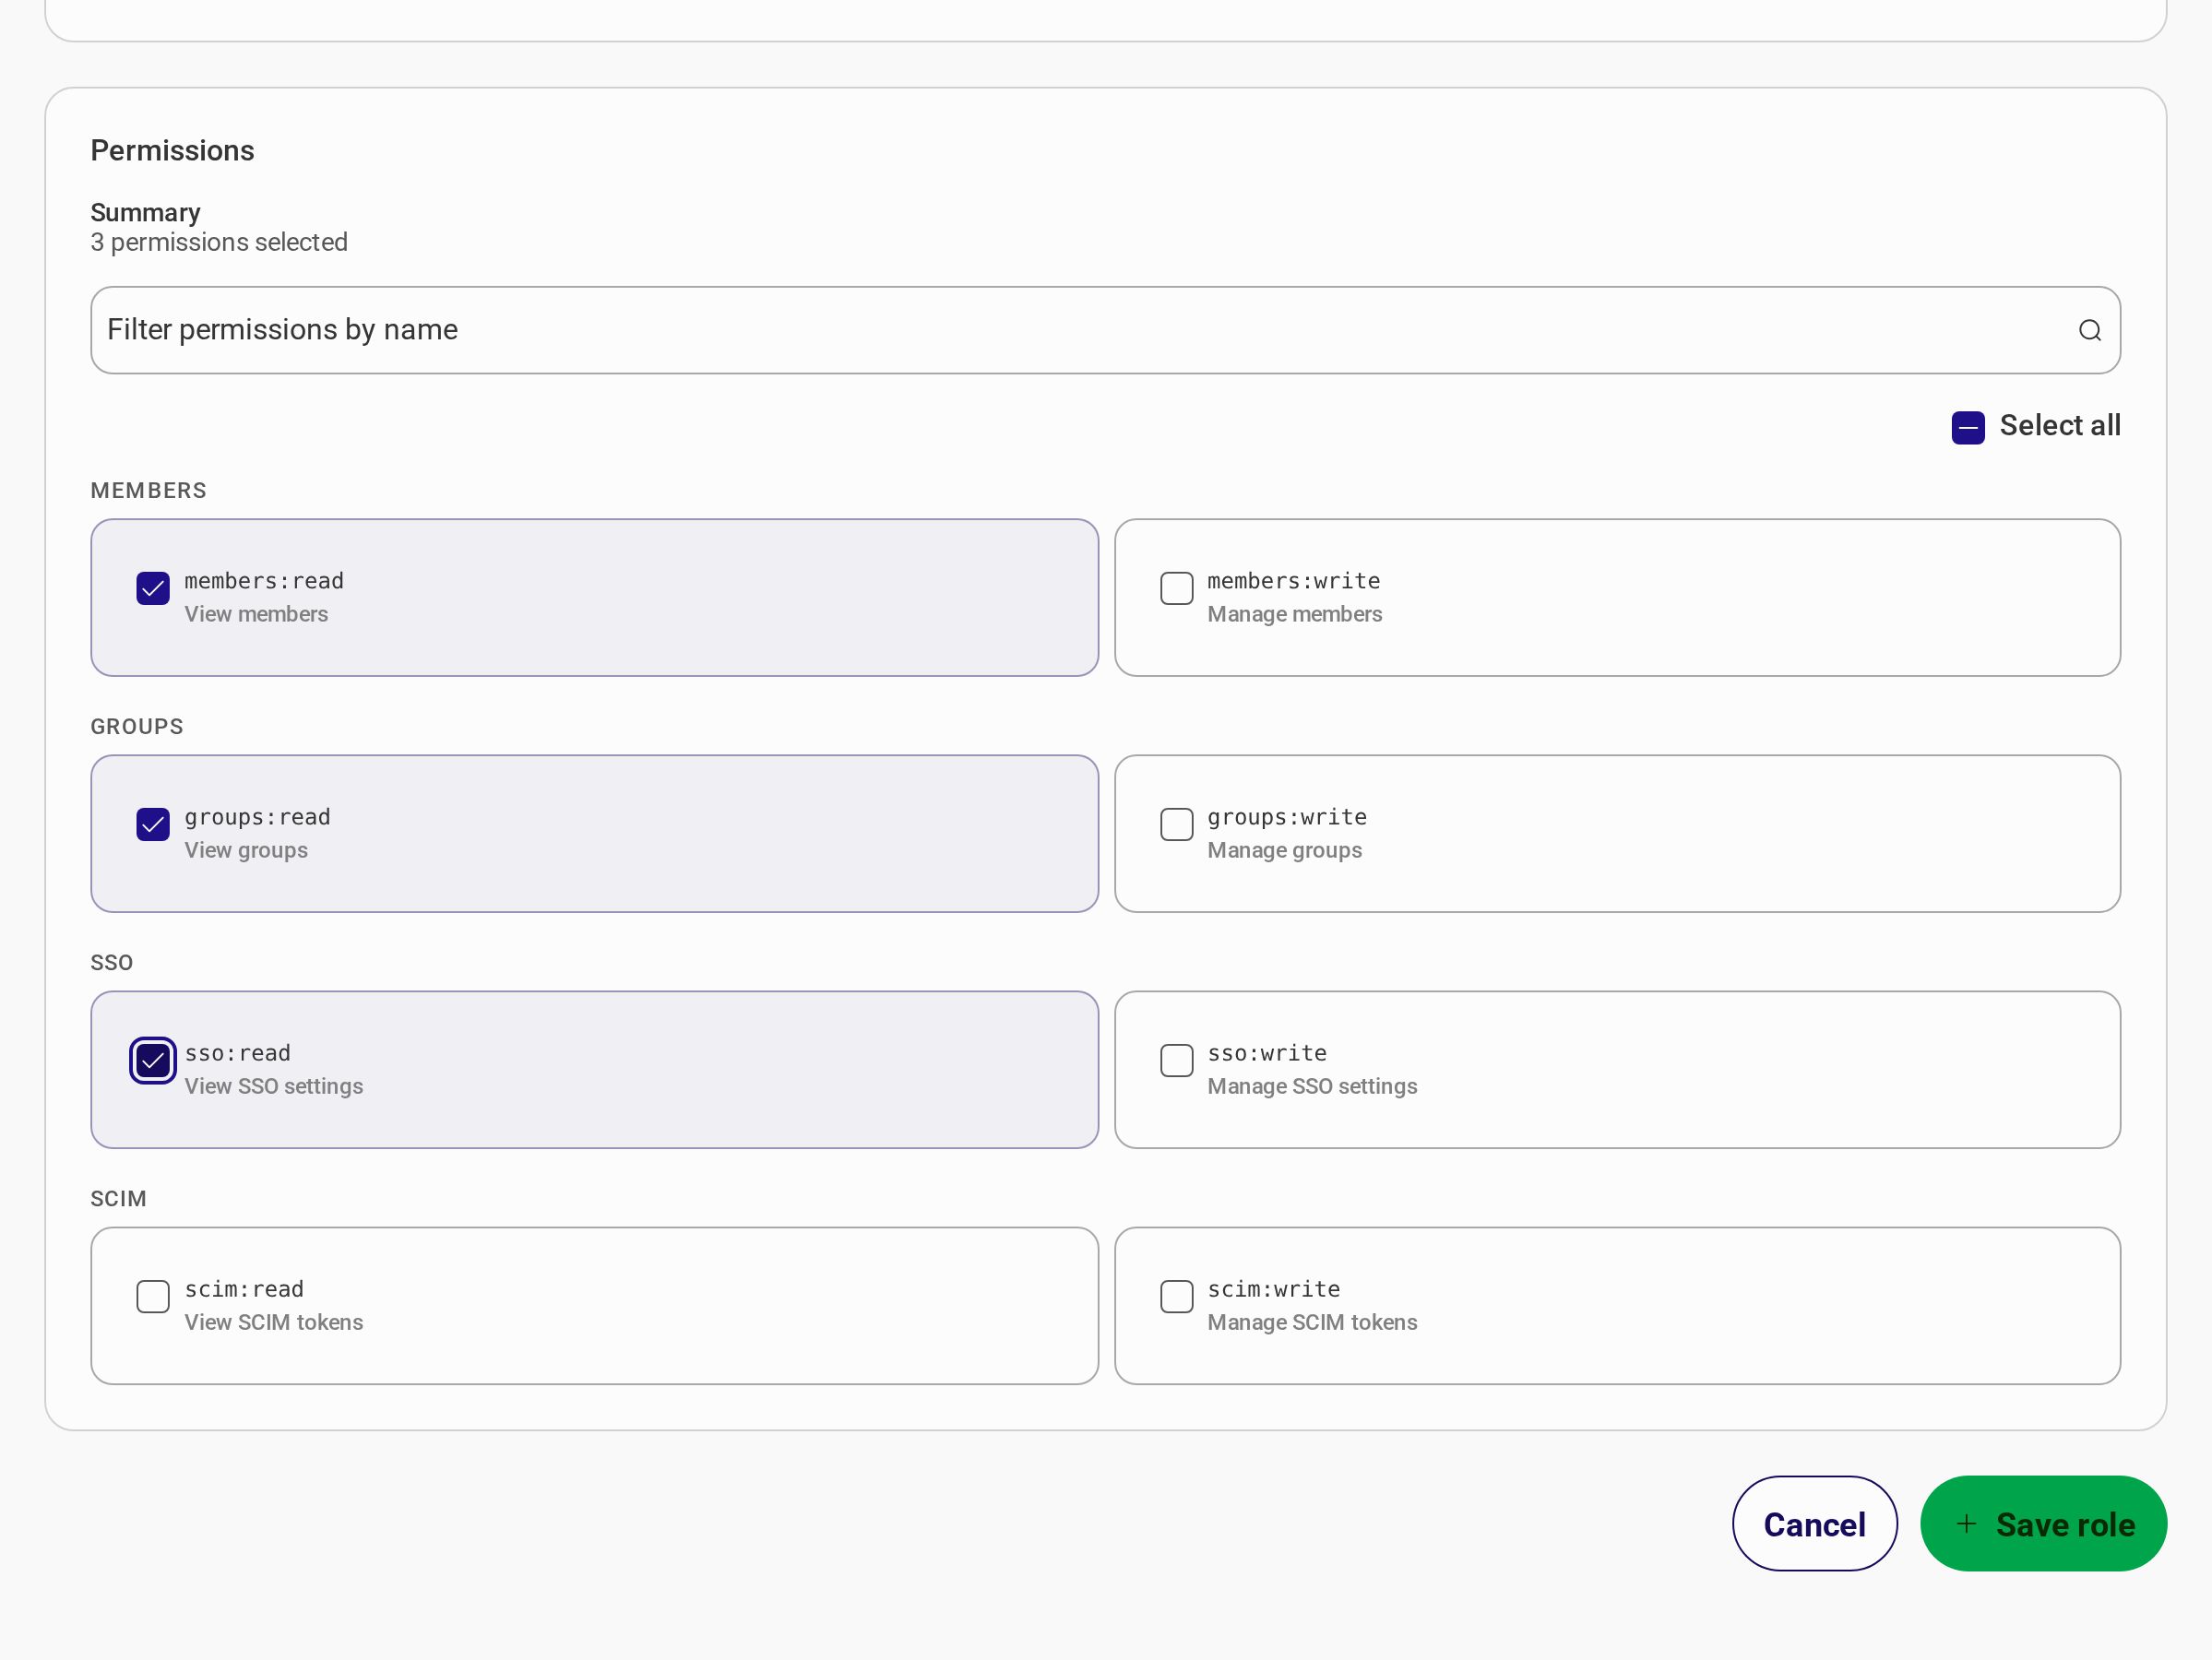
4. Under **Permissions**, select one or more scopes (use the filter to search by identifier).
5. Select **Save role**.
{% hint style="info" %}
Roles are not assigned to members directly. Attach a role to a **group** under **Accesses** so every member of that group inherits the role on the selected linked accounts.
{% endhint %}
### Groups
Bundle **role + tenant** assignments and attach members. Groups are the primary unit for access control across linked Certta products.
| Column | Description |
| --------------- | --------------------------------------------------------------------- |
| **Name** | Group display name. |
| **Description** | Optional summary of the group's purpose. |
| **Members** | Count of members attached to the group. |
| **Assignments** | Count of role + linked-account access rules configured for the group. |
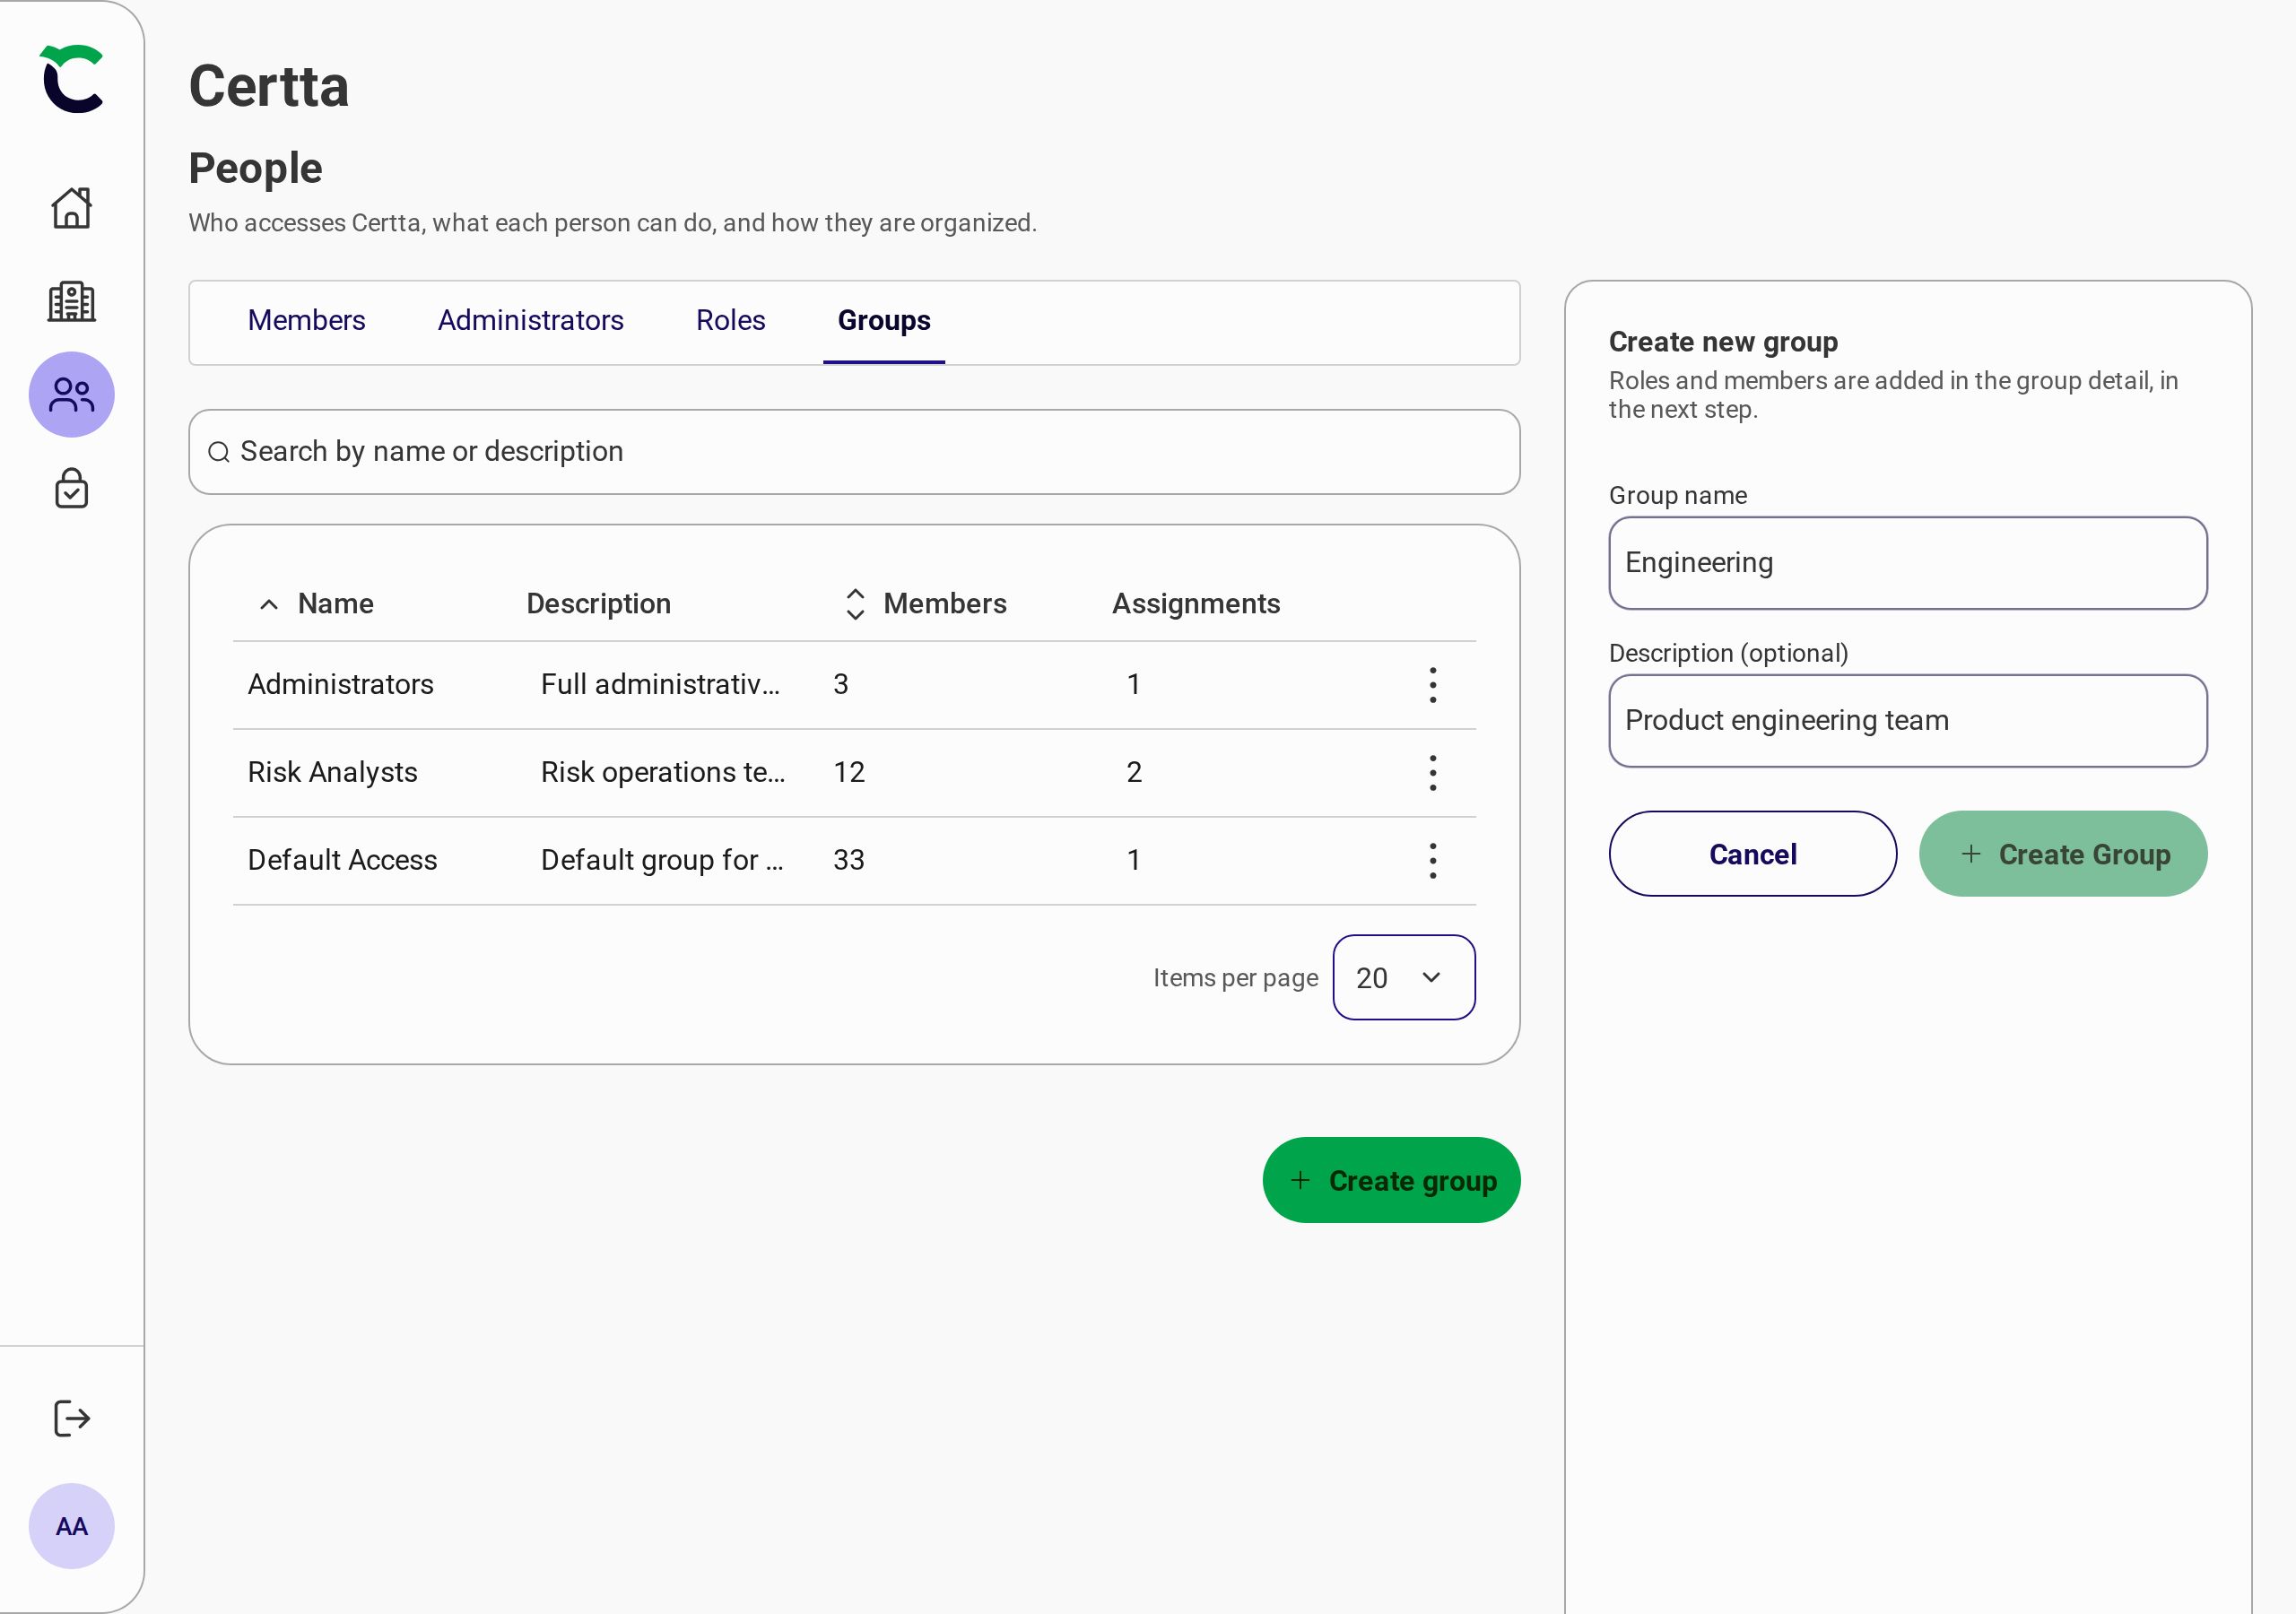
#### Create a group
1. Open **People** → **Groups**.
2. Select **Create group**.
3. Enter a **Group name** and optional **Description**.
4. Select **Create Group** — you are redirected to the group detail page.
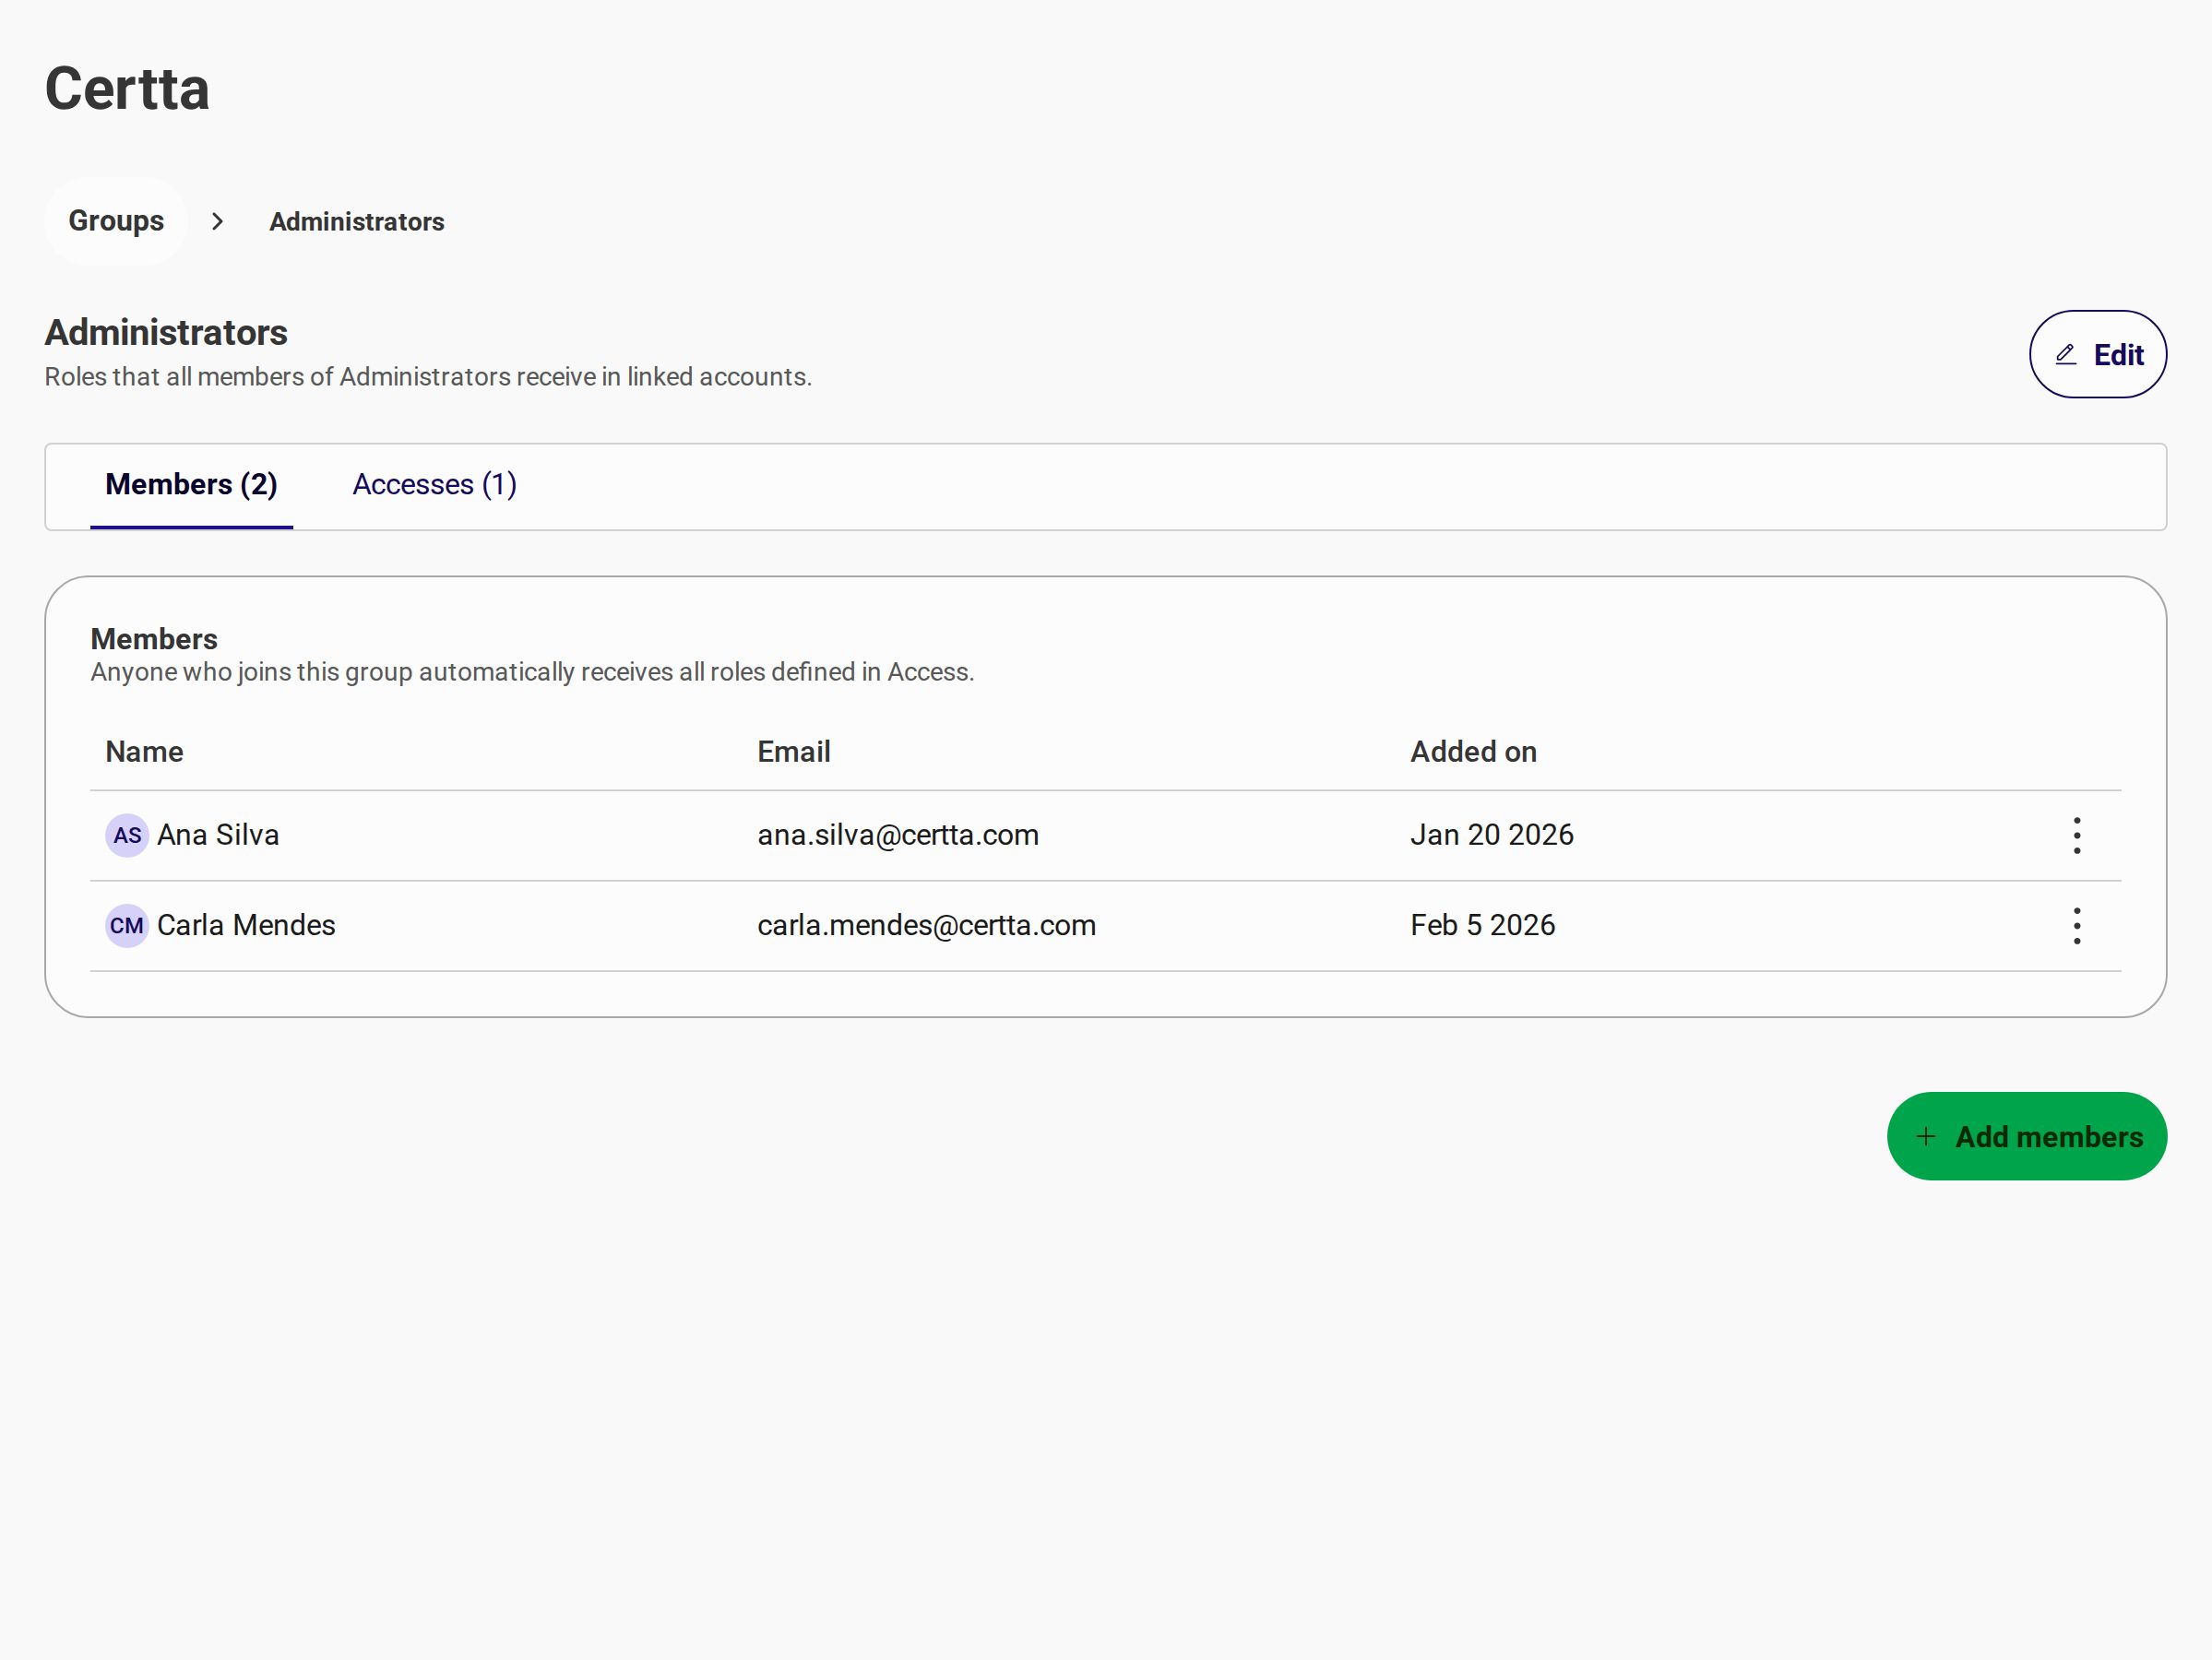
#### Group detail — Members and Accesses
Each group has two tabs:
| Tab | Purpose |
| ------------ | --------------------------------------------------------------------------- |
| **Members** | View and add organization members to the group. |
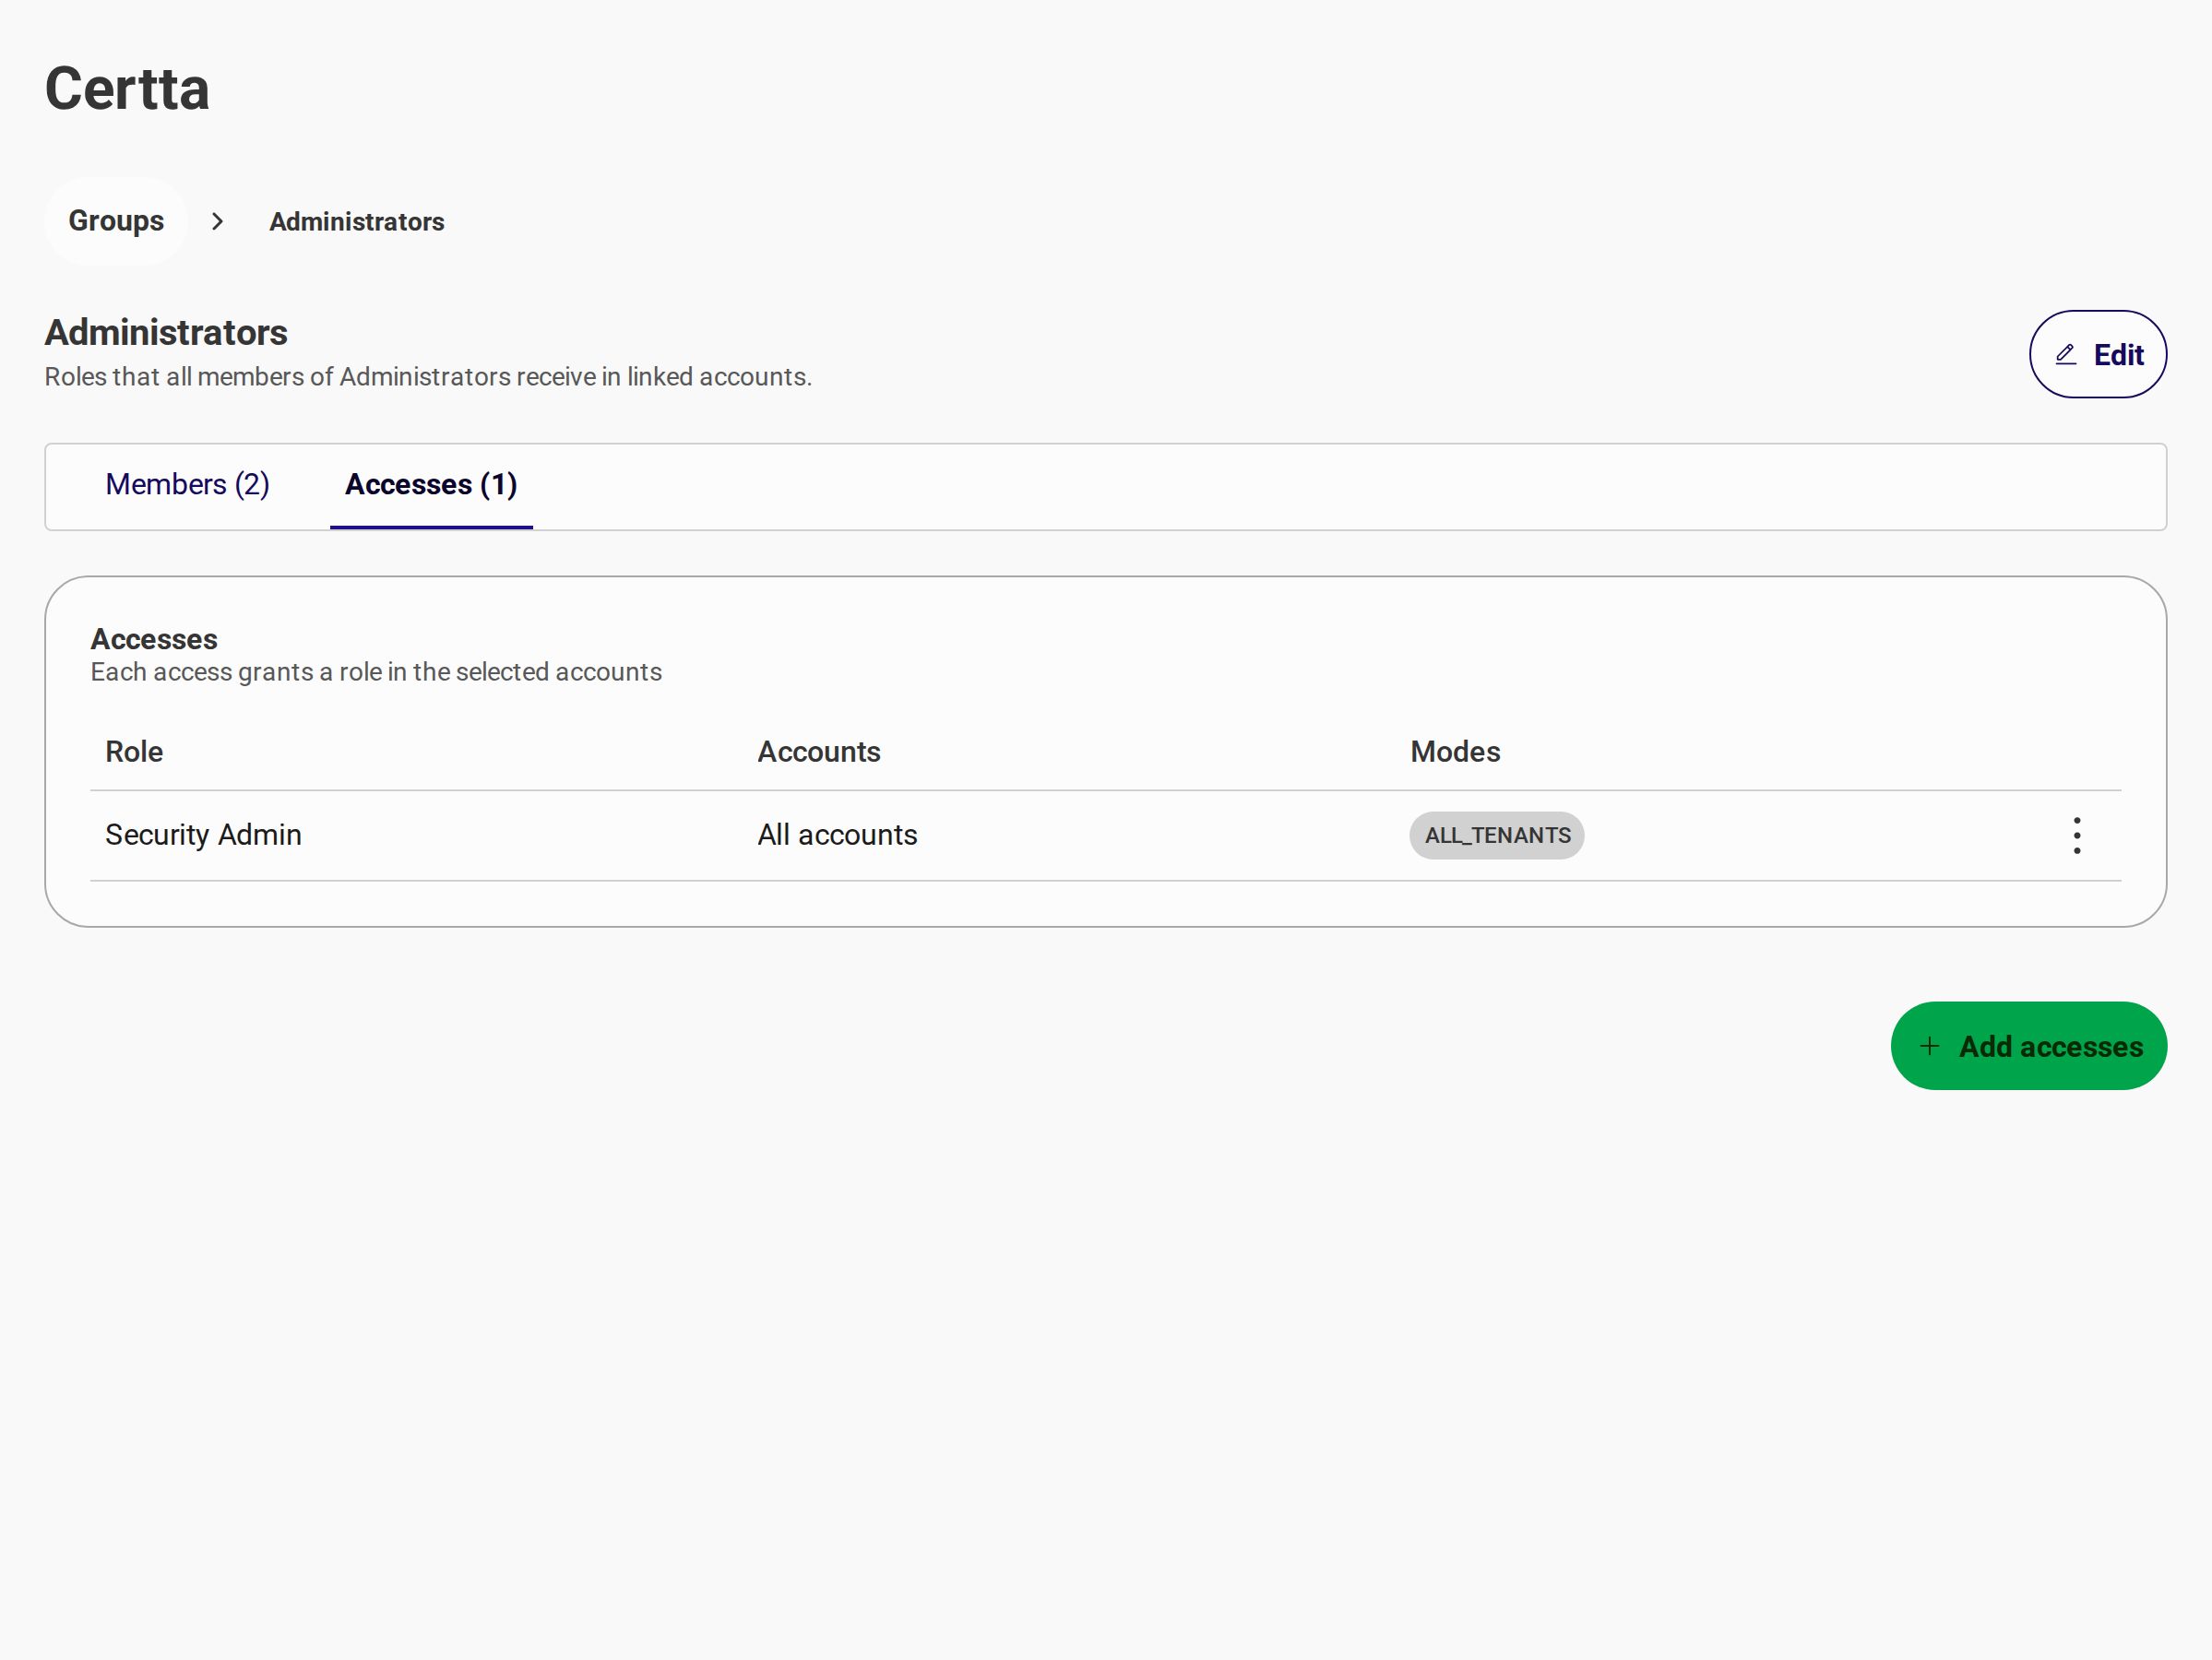
| **Accesses** | Assign **roles** to **linked accounts** (all accounts or specific tenants). |
Open the **Accesses** tab to manage which roles the group grants and on which linked accounts:
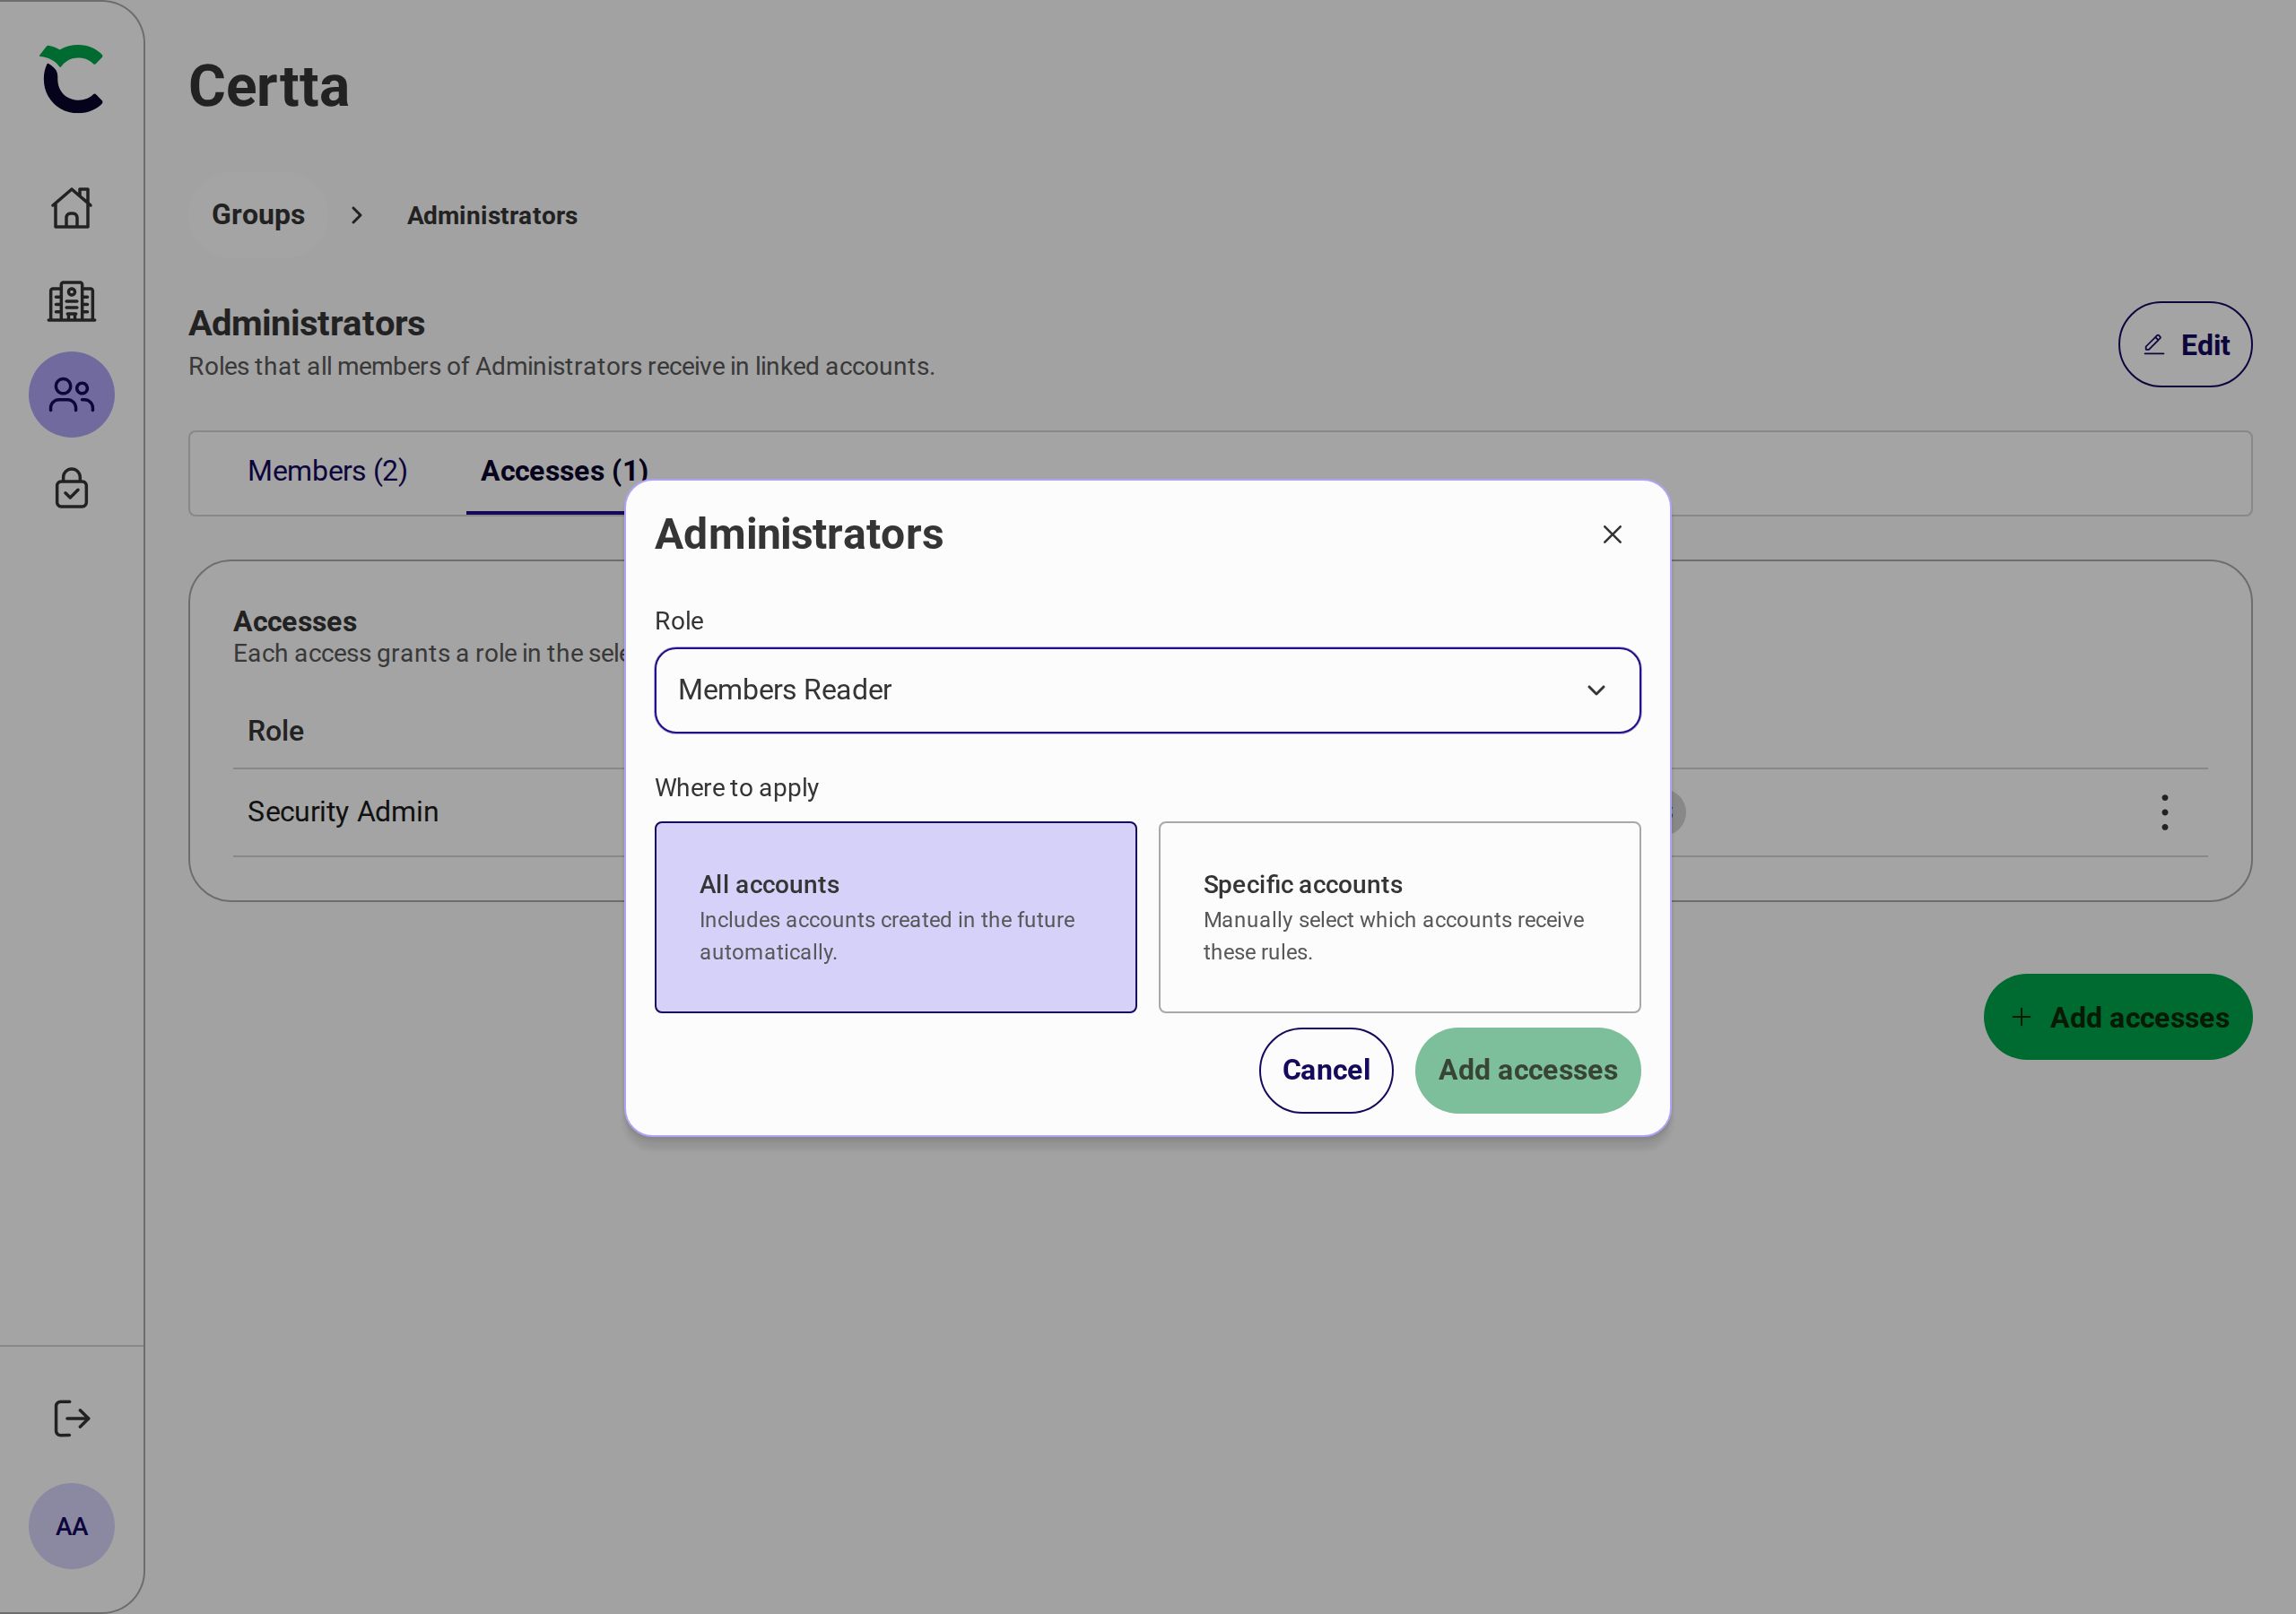
Select **Add accesses** to attach a role:
1. Choose a **Role** from the list of roles defined in **People** → **Roles**.
2. Under **Where to apply**, pick **All accounts** or **Specific accounts**.
3. For specific accounts, select one or more linked accounts from the list.
4. Select **Add accesses**.
{% hint style="warning" %}
Create **roles** and **groups** before configuring **Security** → **Group assignment rules**. SSO rules target existing groups — they do not create groups automatically.
{% endhint %}
***
## Security
Open **Security** in the sidebar (labeled **Authentication** in the page header). Four tabs cover federation and provisioning.
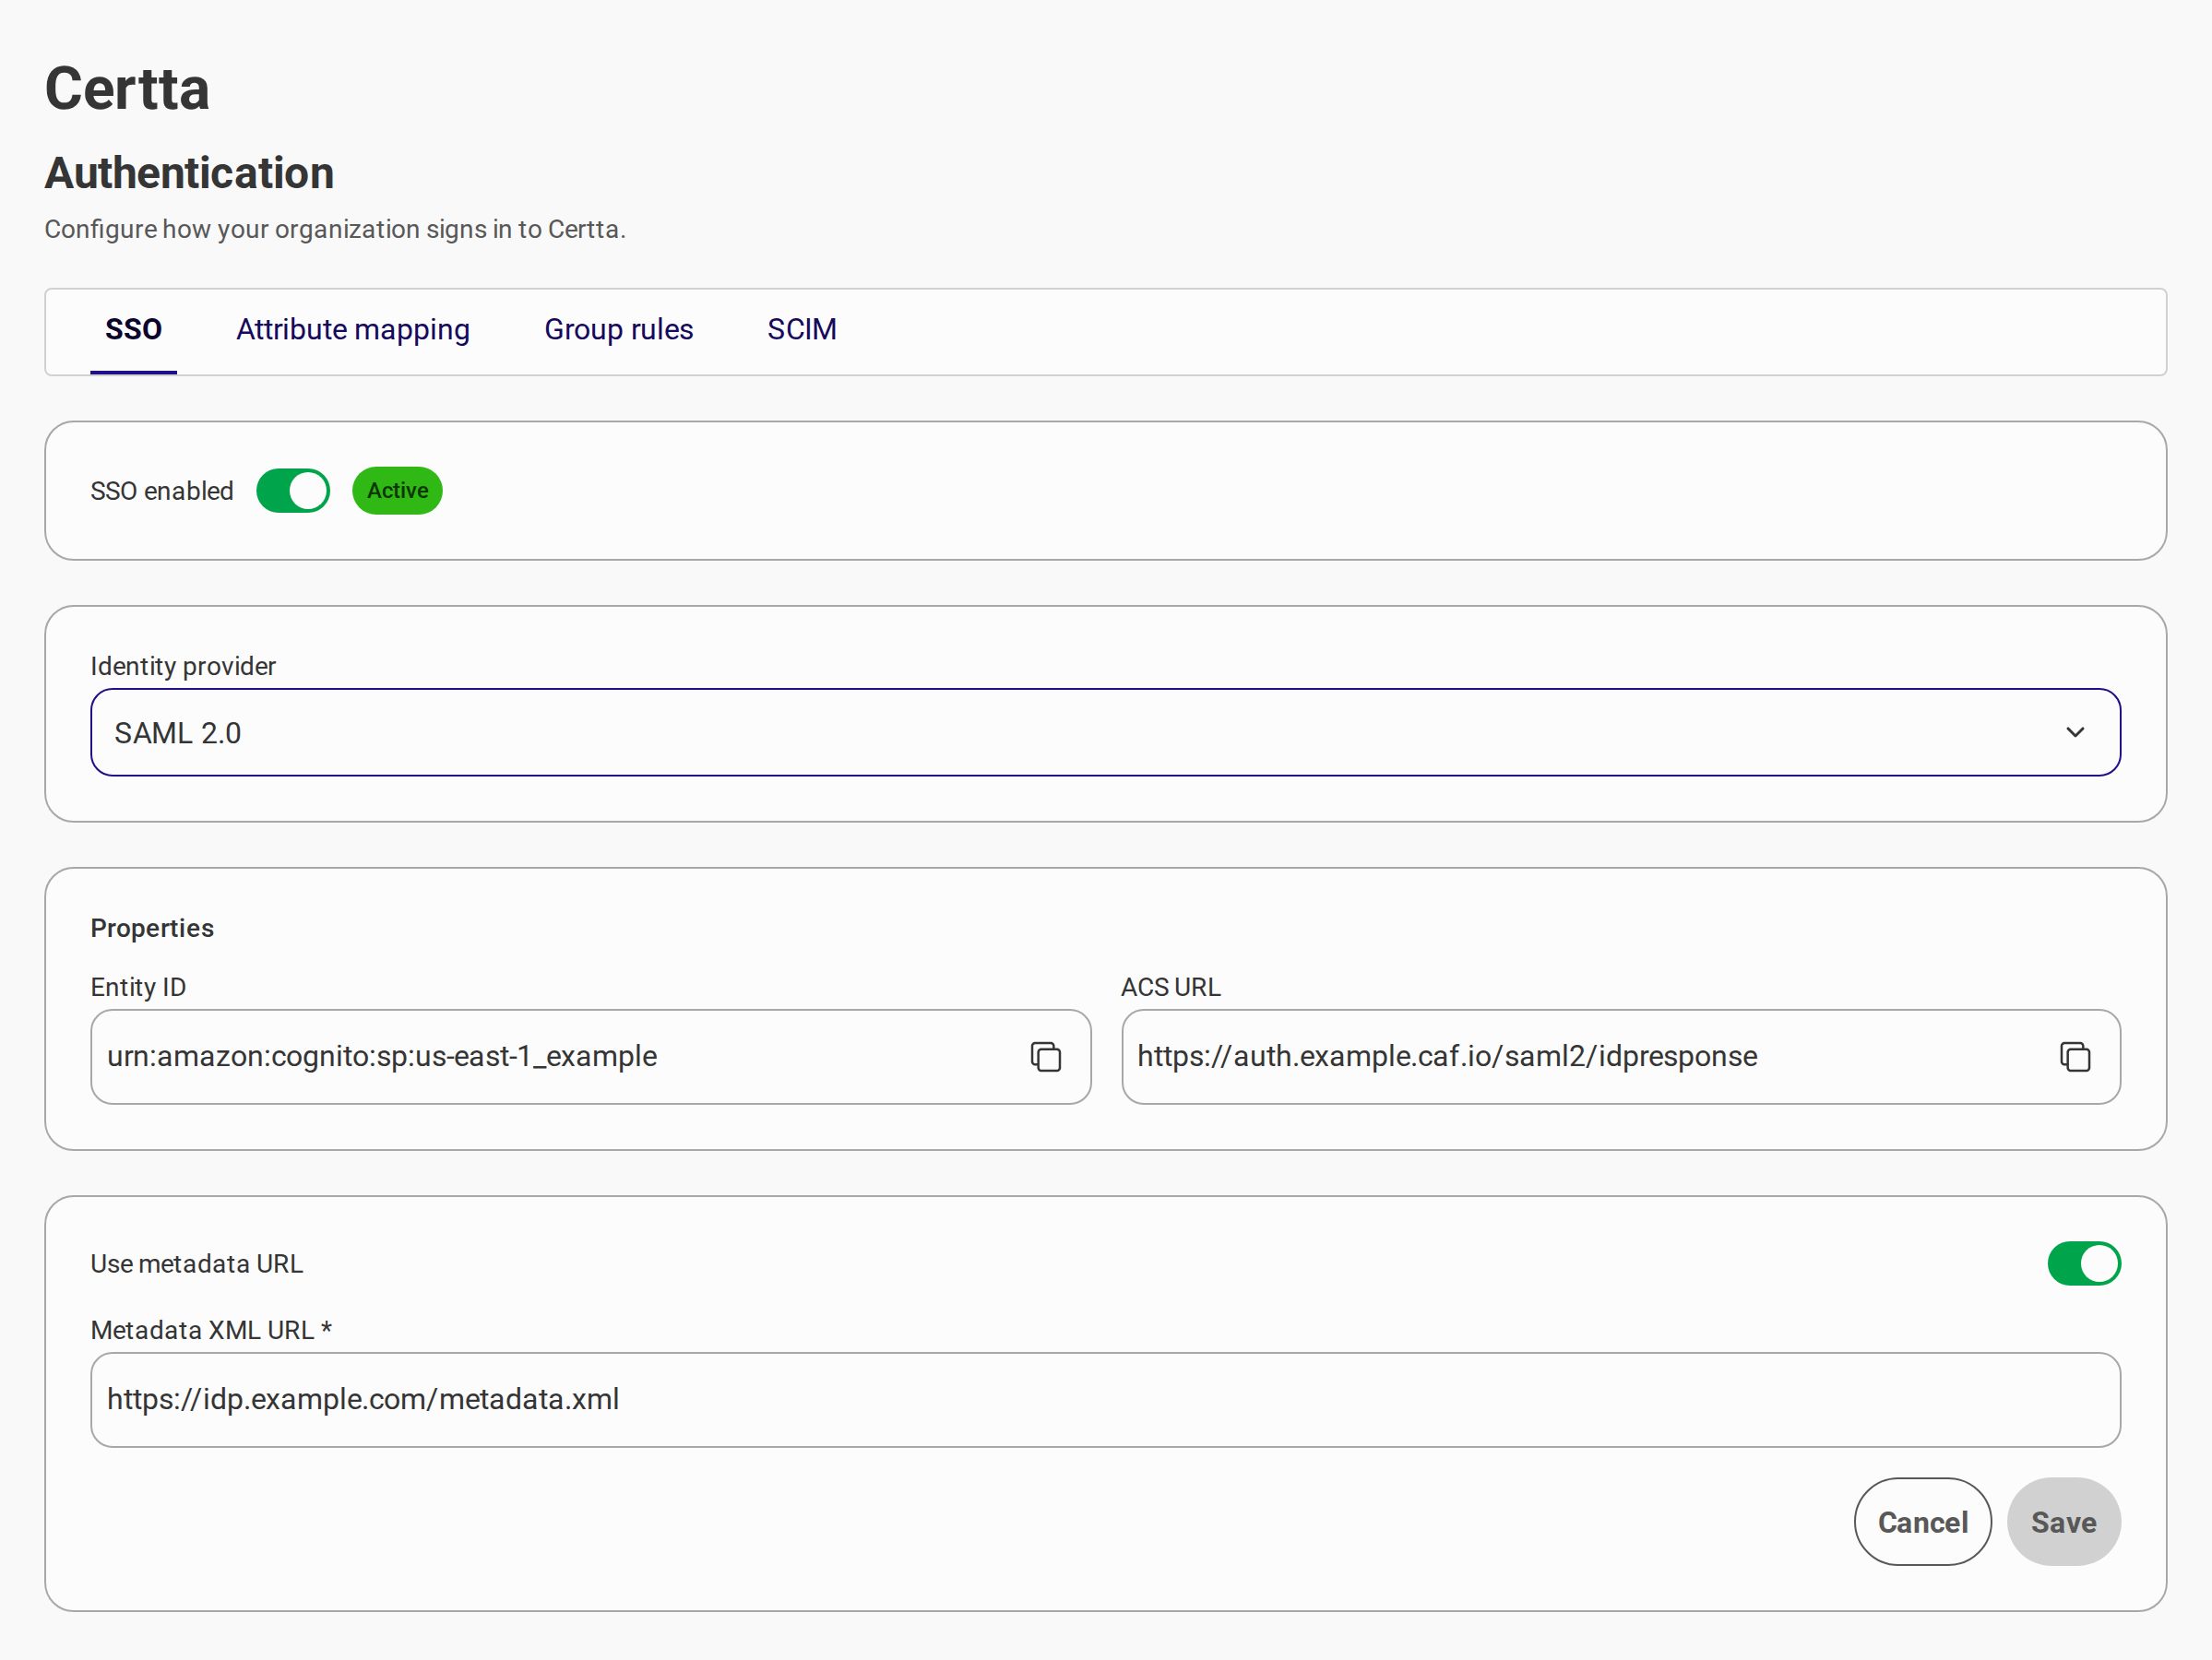
### SSO
Enable SAML or OIDC, copy Service Provider values for your identity provider, and save provider configuration.
See the [SSO Configuration Guide](/caf-docs/user-guide/organizations/sso-configurations.md) and provider-specific guides for step-by-step setup.
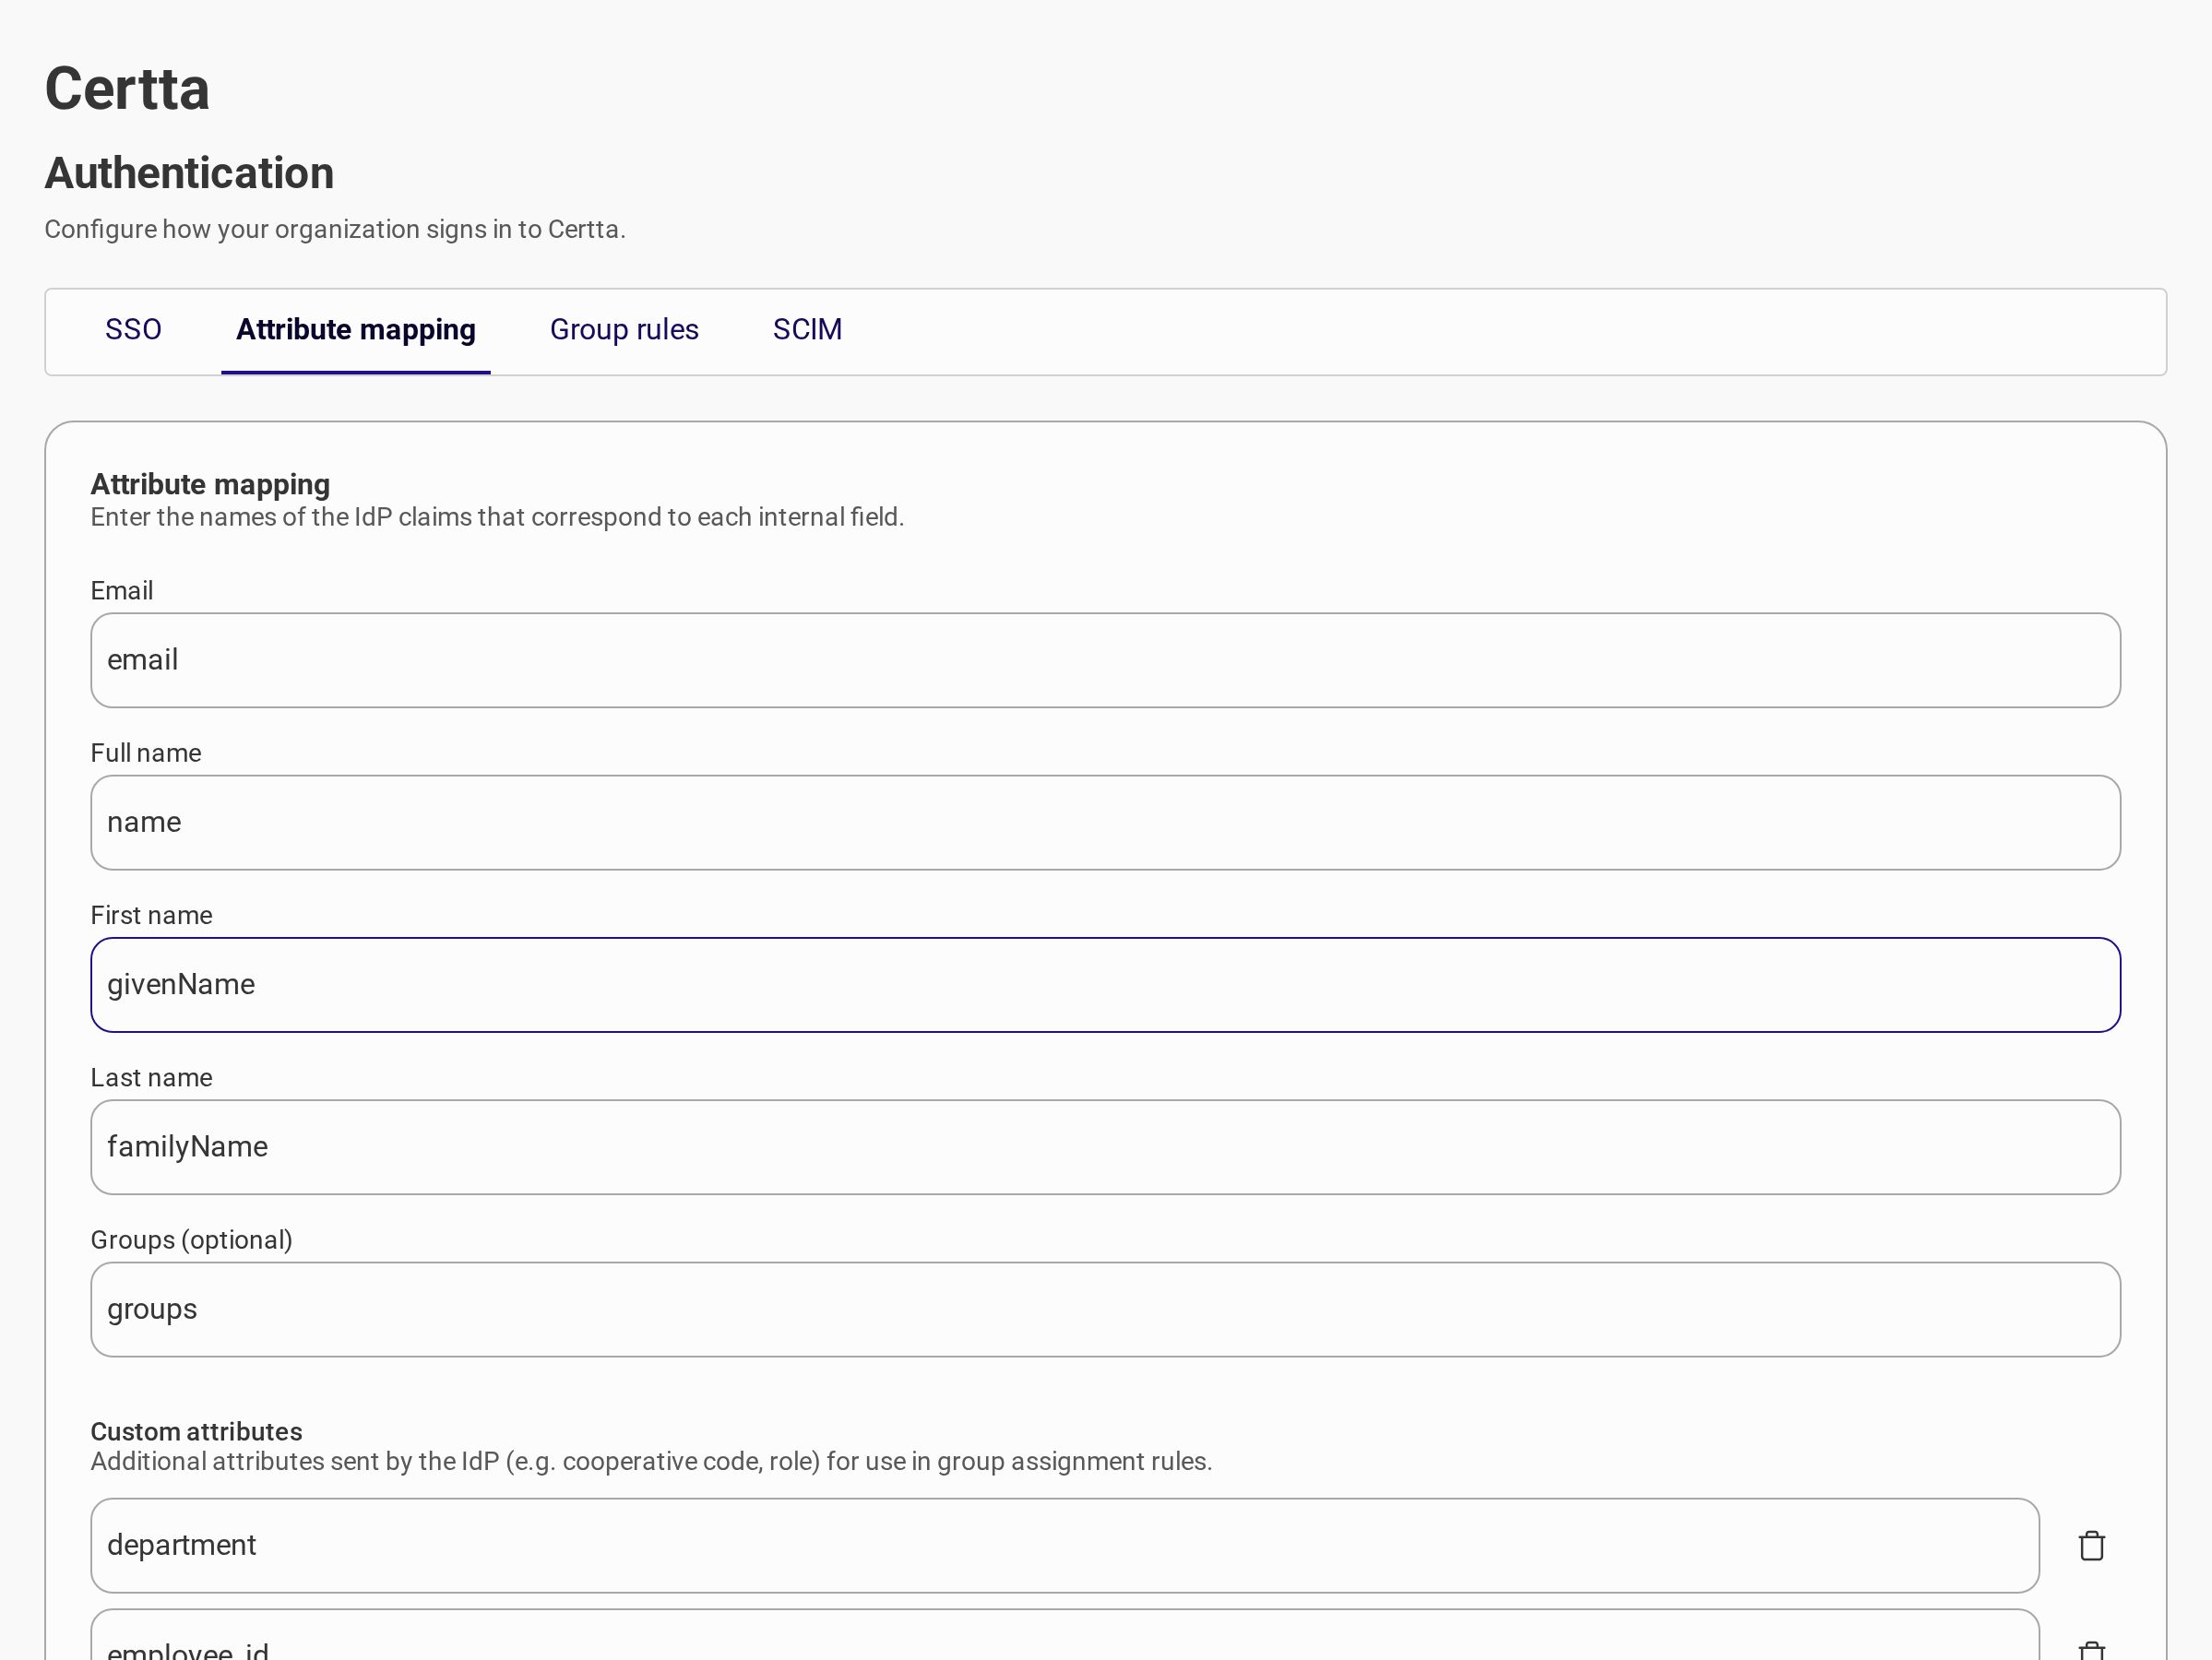
### Attribute mapping
Map identity provider claims to member fields used during SSO sign-in.
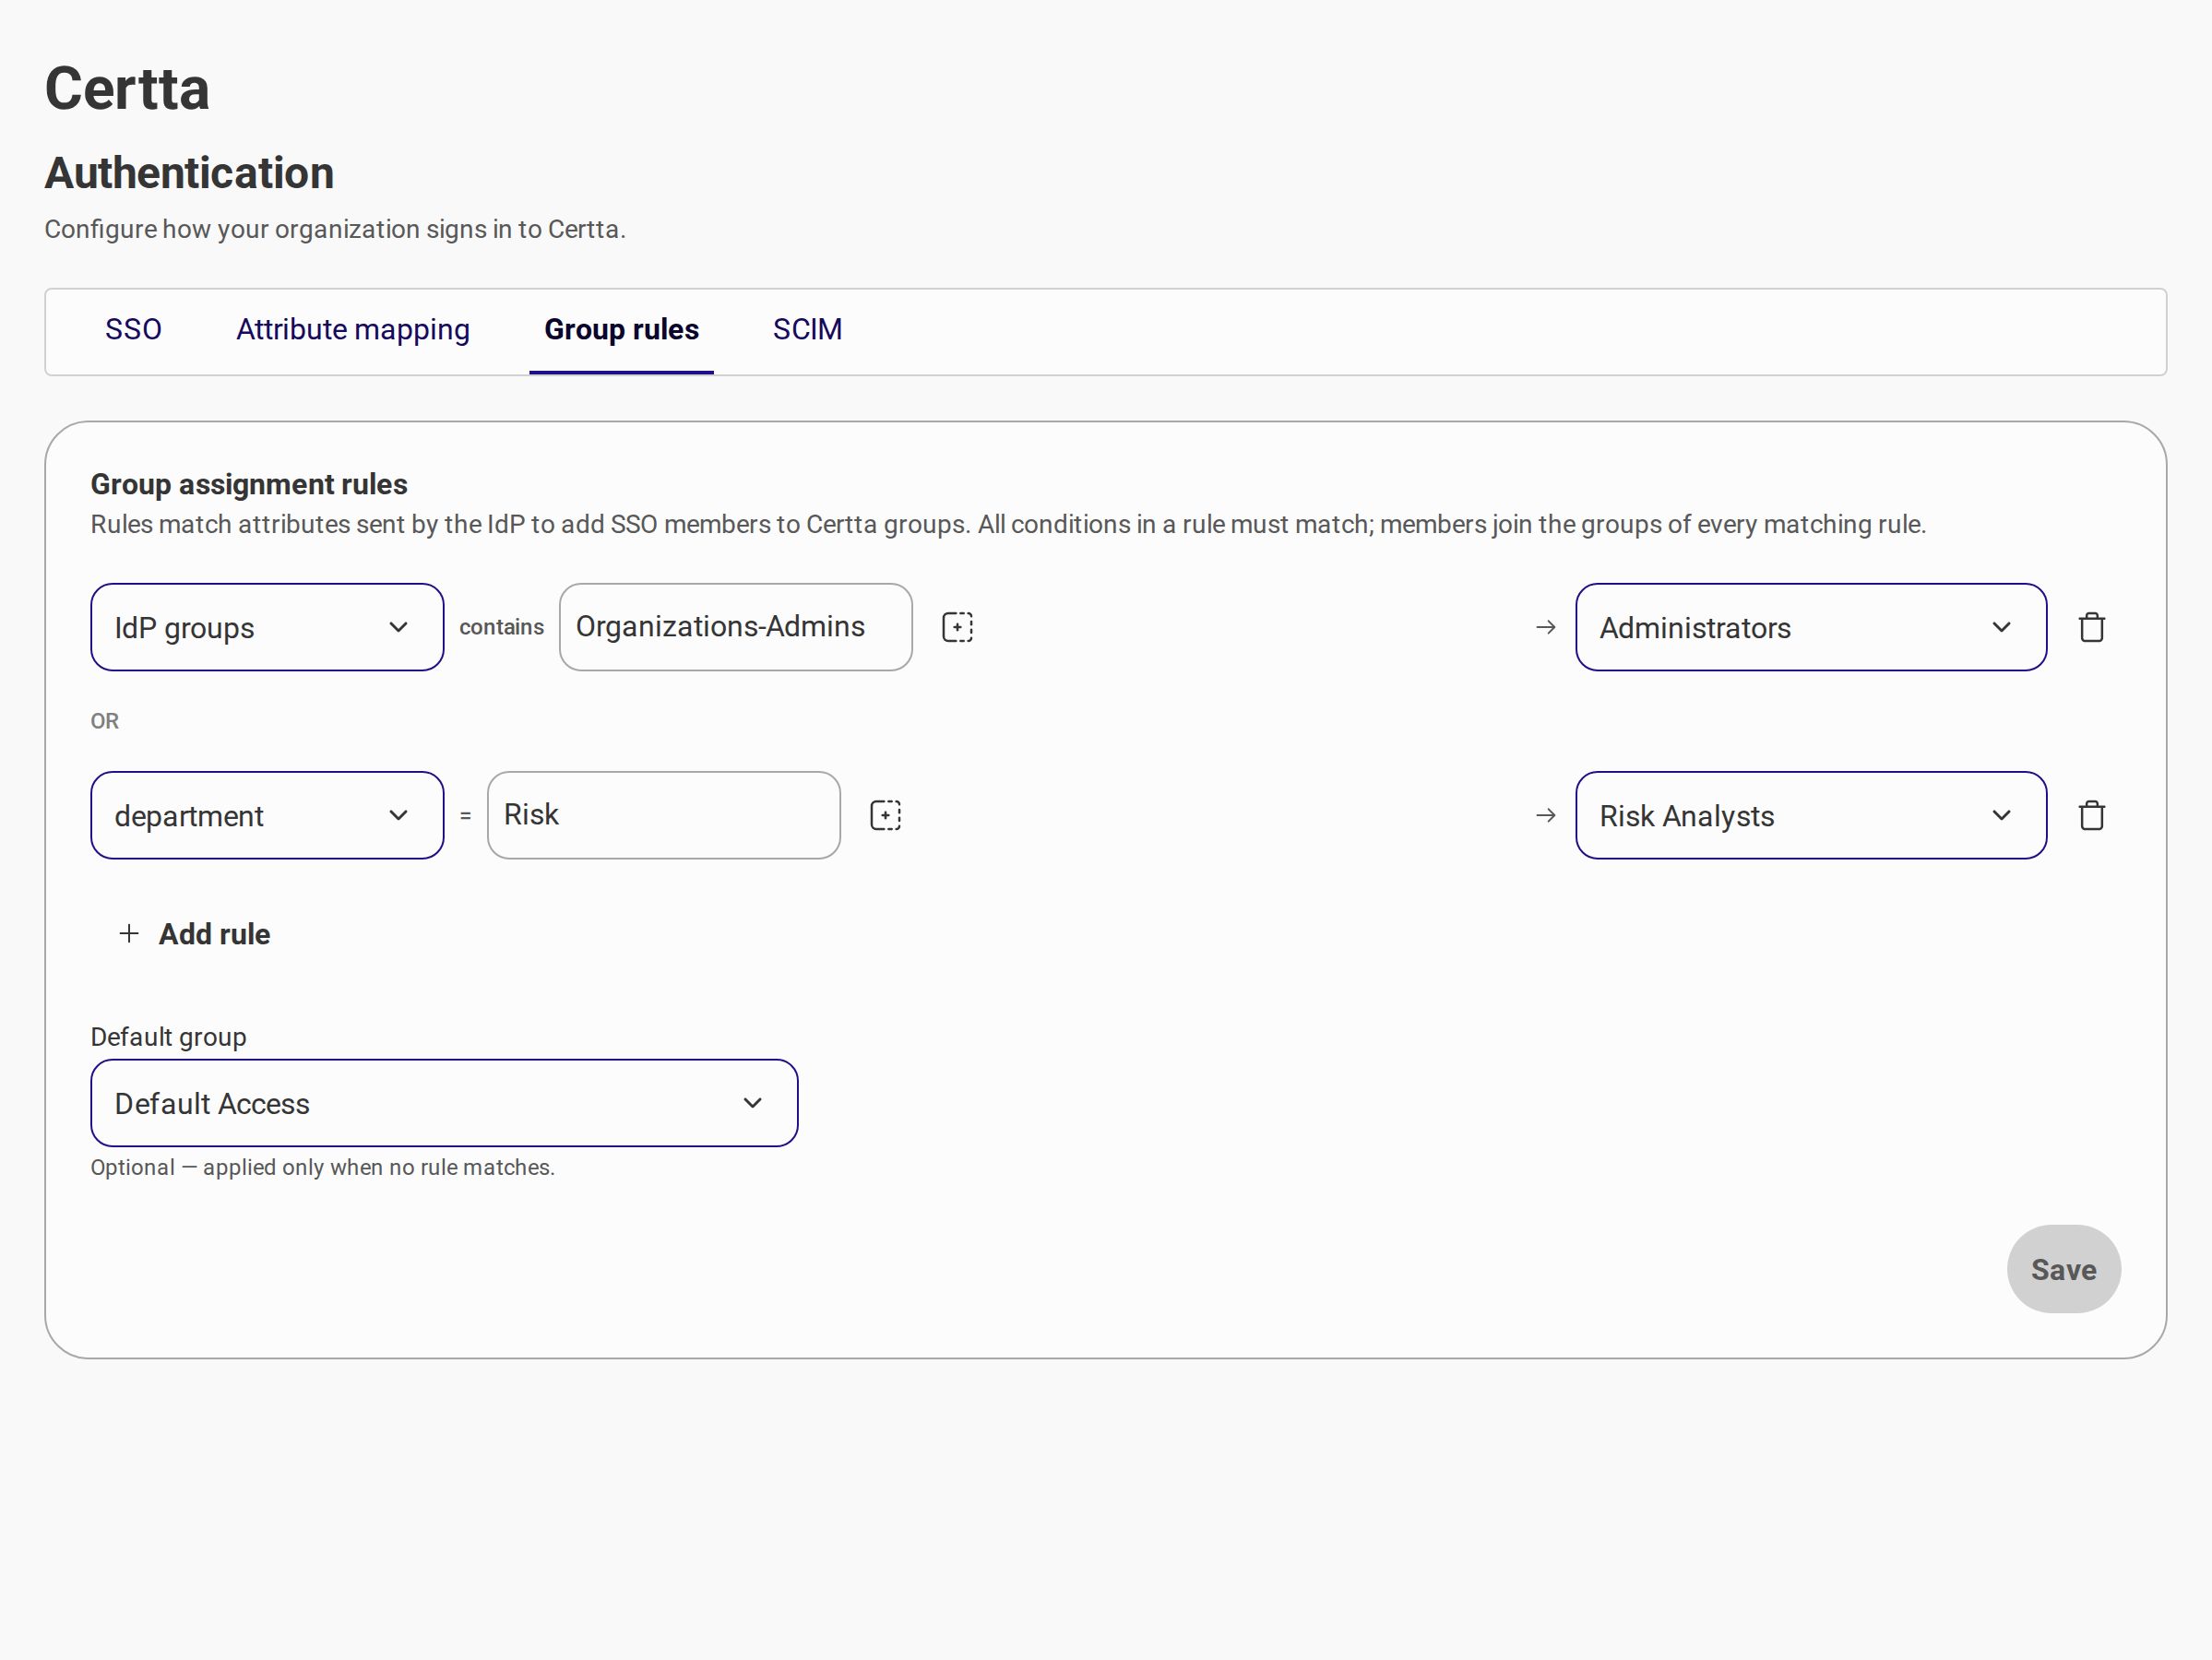
### Group assignment rules
Assign members to groups automatically based on IdP attributes (for example, directory groups or department).
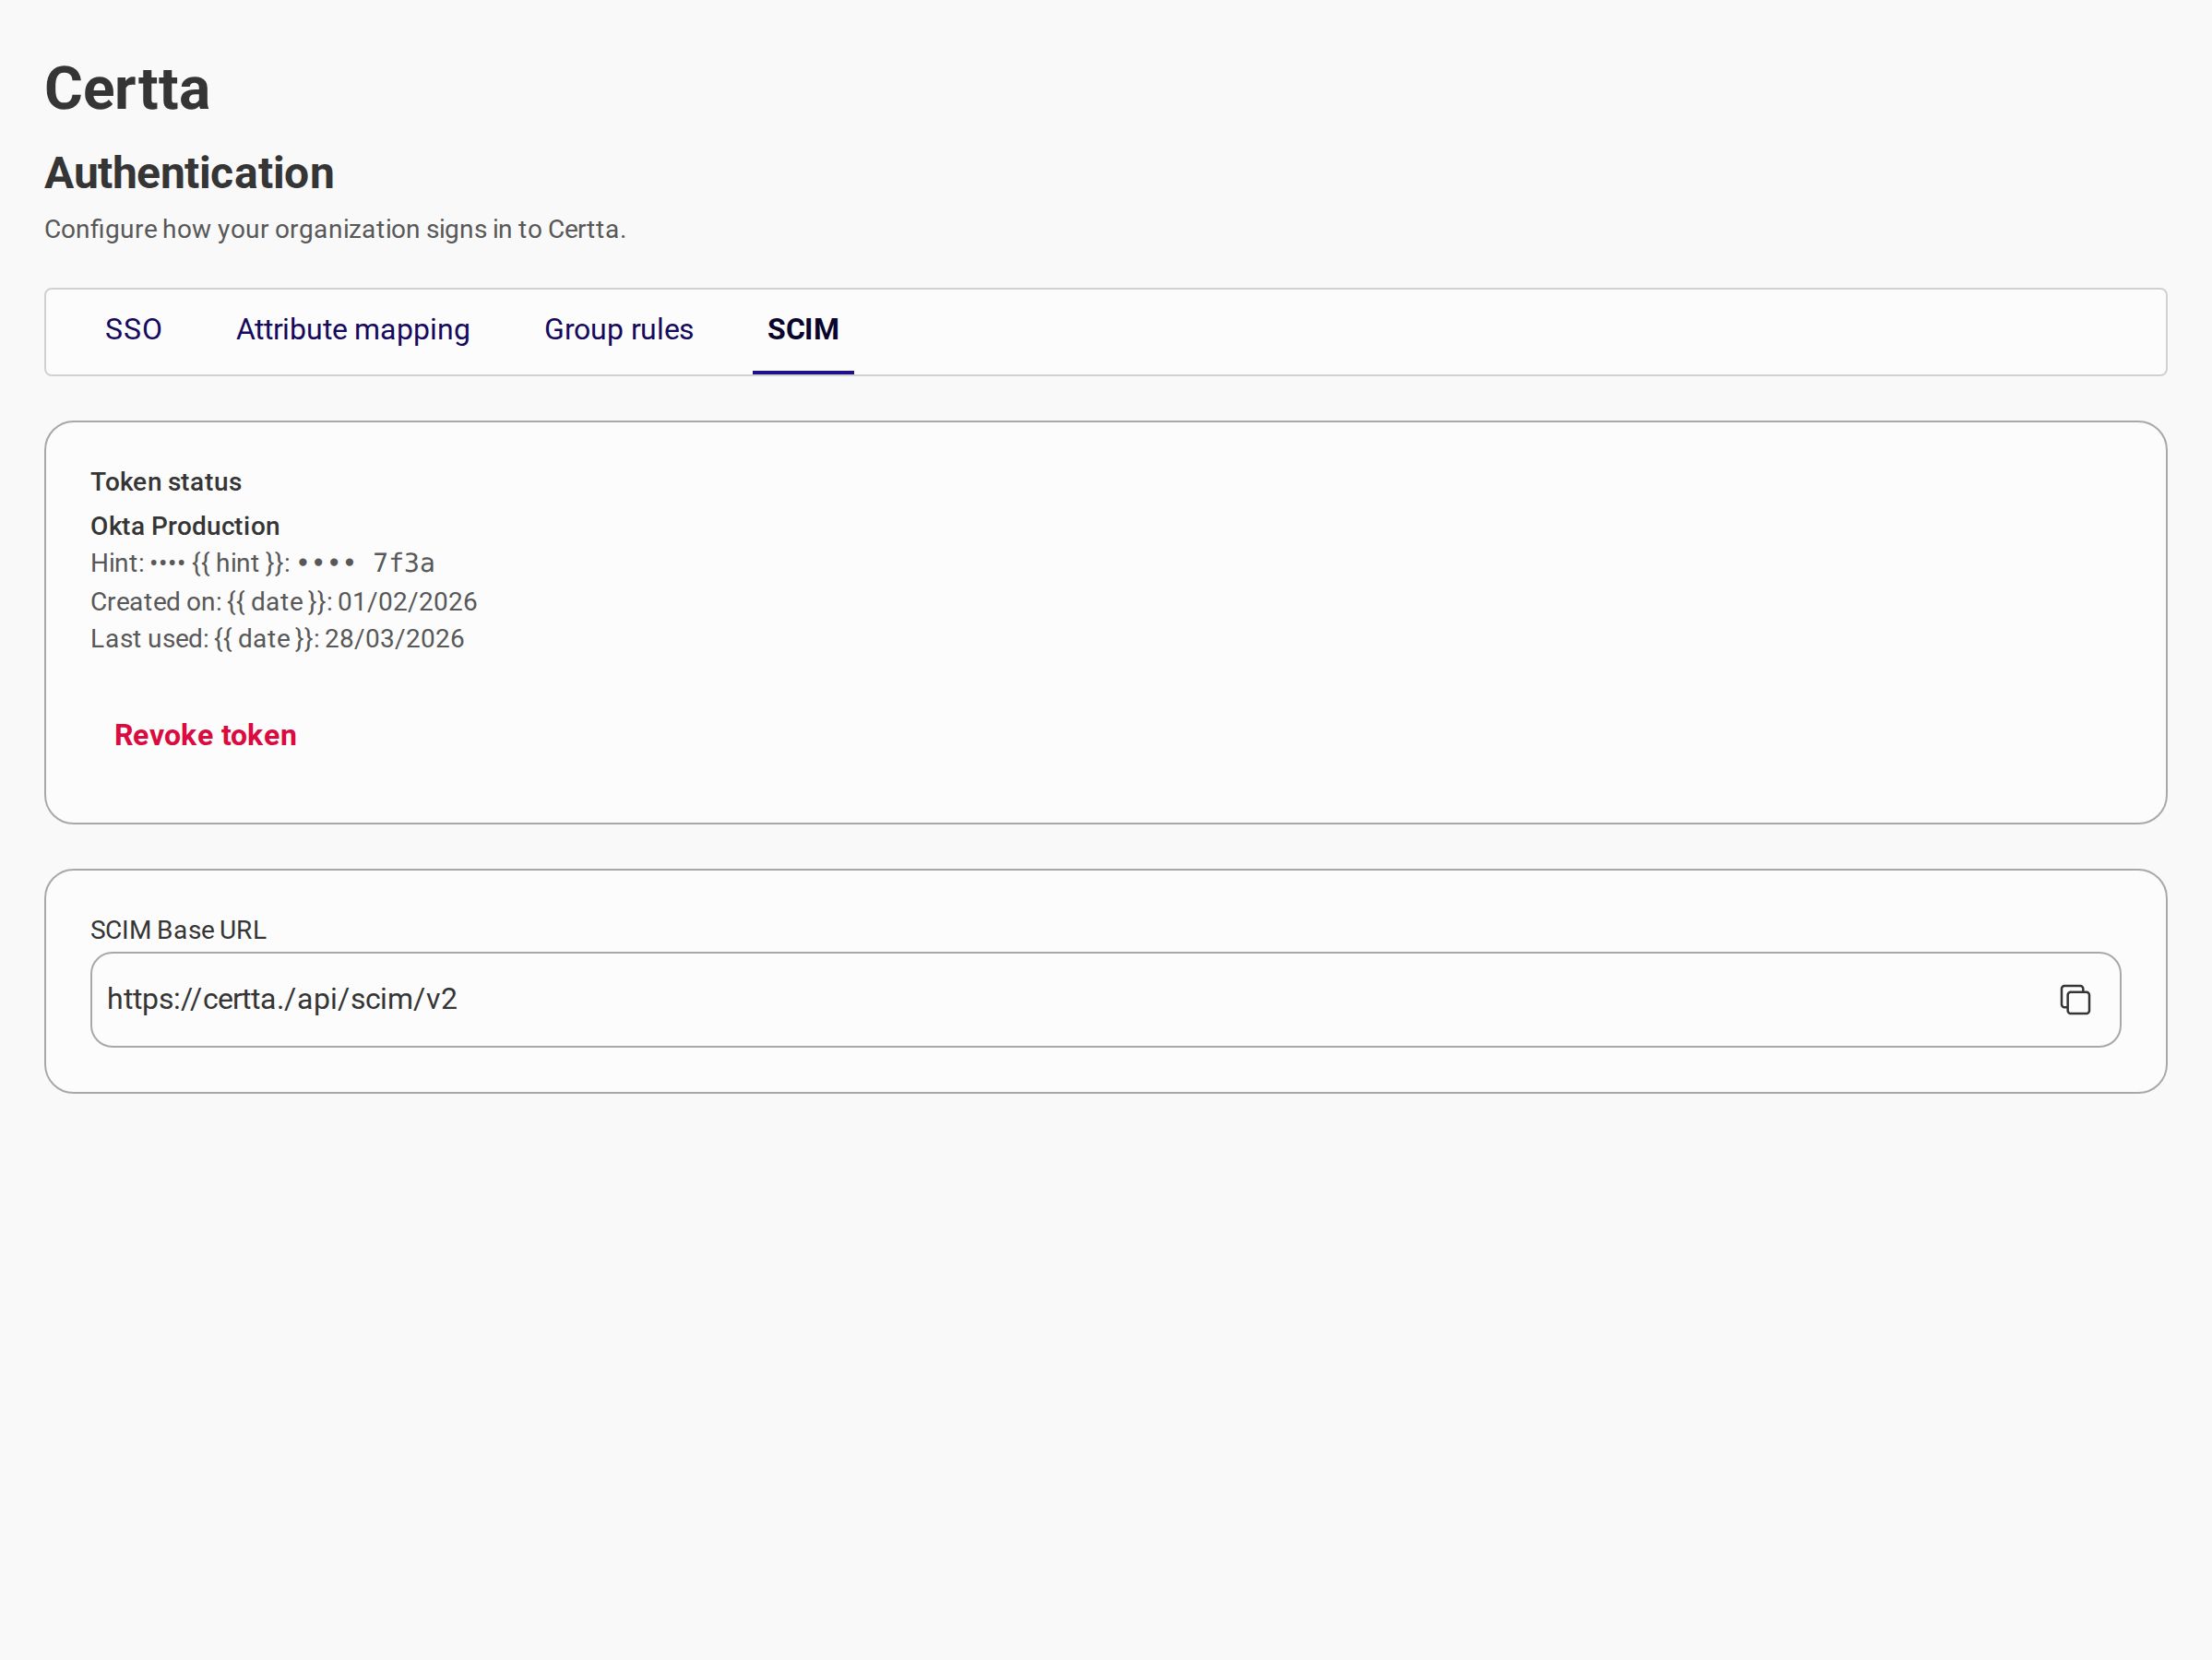
### SCIM
Generate a bearer token and SCIM base URL for automated user provisioning from your identity provider.
See the [SCIM Provisioning Guide](/caf-docs/user-guide/organizations/scim-provisioning.md) for setup steps, supported operations, and how SCIM interacts with SSO.
***
## Related documentation
* [SSO Configuration](/caf-docs/user-guide/organizations/sso-configurations.md)
* [SCIM Provisioning](/caf-docs/user-guide/organizations/scim-provisioning.md)
* [Microsoft Entra ID (SAML)](/caf-docs/user-guide/organizations/sso-configurations/microsoft-entra-id.md)
* [Microsoft Entra ID (OIDC)](/caf-docs/user-guide/organizations/sso-configurations/generic.md)
* [Okta (SAML / OIDC)](/caf-docs/user-guide/organizations/sso-configurations/okta.md)
* [Auth0 (SAML / OIDC)](/caf-docs/user-guide/organizations/sso-configurations/auth0.md)
* [Google Workspace (SAML)](/caf-docs/user-guide/organizations/sso-configurations/google.md)
* [Generic Provider (SAML / OIDC)](/caf-docs/user-guide/organizations/sso-configurations/generic.md)
---
# Agent Instructions
This documentation is published with GitBook. GitBook is the documentation platform designed so that both humans and AI agents can read, navigate, and reason over technical content effectively. Learn more at gitbook.com.
## Querying This Documentation
If you need additional information that is not directly available in this page, you can query the documentation dynamically by asking a question.
Perform an HTTP GET request on the current page URL with the `ask` query parameter, and the optional `goal` query parameter:
```
GET https://docs.caf.io/caf-docs/user-guide/organizations.md?ask=&goal=
```
`ask` is the immediate question: it should be specific, self-contained, and written in natural language.
`goal` is optional and describes the broader end goal you are ultimately trying to accomplish on behalf of the user. GitBook uses it to tailor the answer towards what is most useful for that goal.
The response will contain a direct answer to the question and relevant excerpts and sources from the documentation.
Use this mechanism when the answer is not explicitly present in the current page, you need clarification or additional context, or you want to retrieve related documentation sections.